Importing data
- List Upload Error Messages
- How to Add an Additional Person
- How to Upload Records as Stakeholders, Test Accounts and Seeds
- How to set up a FTP Import
- How to edit a FTP Import task
List Upload Error Messages
If you encounter any of the following error messages while trying to upload a list into CONNECT, follow the instructions below.
1. "The file you have selected has duplicate header names. Please correct this issue and try again."
- This error message indicates that you are trying to upload a file that has more then one header with the same name.
- To fix this, open your file in Microsoft Excel and change one of the header names so that they no longer match.
2. "The file you have selected has columns without headers. Please correct this issue and try again."
This error message indicates that you have selected a file that has columns with blank headers. This can happen in two situations (or a combination of both).
- The file you are trying to upload has columns with data but at least one of the columns is missing a header (see example on left).
- The file you are trying to upload has "ghost" columns. These are columns that have no values in any of the rows (including the header) but are represented in the file by commas.
- Follow the instructions below to fix this issue.
2.1. Identifying files with "Ghost" columns
- If you think your file has "ghost" columns, there is an easy way to tell. Simply open your file in Notepad (TextEdit on Mac) and you will generally see an abundance of commas at the end of each row.
- In a CSV (Comma Delimited Values) file, each comma indicates to Excel or CONNECT that there is another column,
- Hence when there is an abundance of extra commas on the end of each row, that is indicating to the program that there are extra columns.
2.2. Fixing files with "Ghost" columns
To fix the issue of "ghost" columns, you first want to open your file in Microsoft Excel. In Excel, you will not be able to see the columns.
The best way to get rid of them is to highlight a lot of extra columns to the right of your data.
- Highlight the columns by clicking one of the letter headers at the top, holding down your click and dragging across until you've highlighted enough columns. The more you highlight, you the more likely you are to catch all of the ghost columns.
- Right click on any of column letters as the top and select "Delete". Save your file and exit Excel.
- To confirm you have successfully deleted the "ghost" columns, re-open your file in notepad and the extra commas should be gone.
How to Add an Additional Person
There are situations where you might need to add one more person to your DataMart, either a customer or maybe you have a new team member you would like to add as a stakeholder. Here's how.
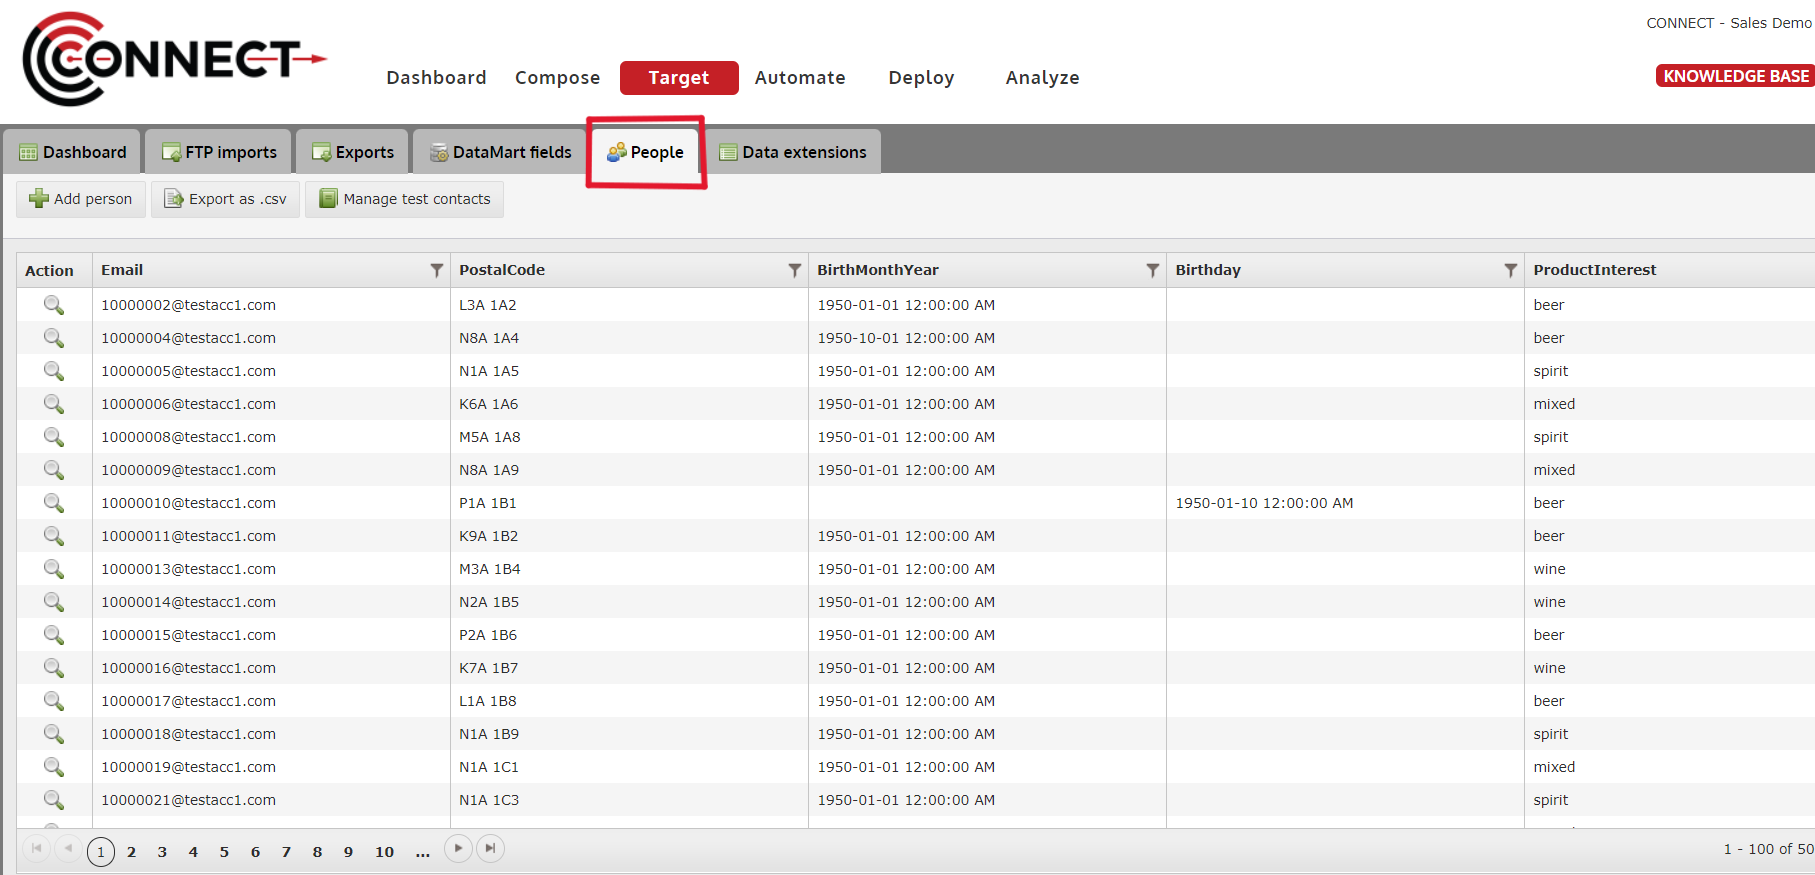
1. To begin, click on the People tab located in the Target screen
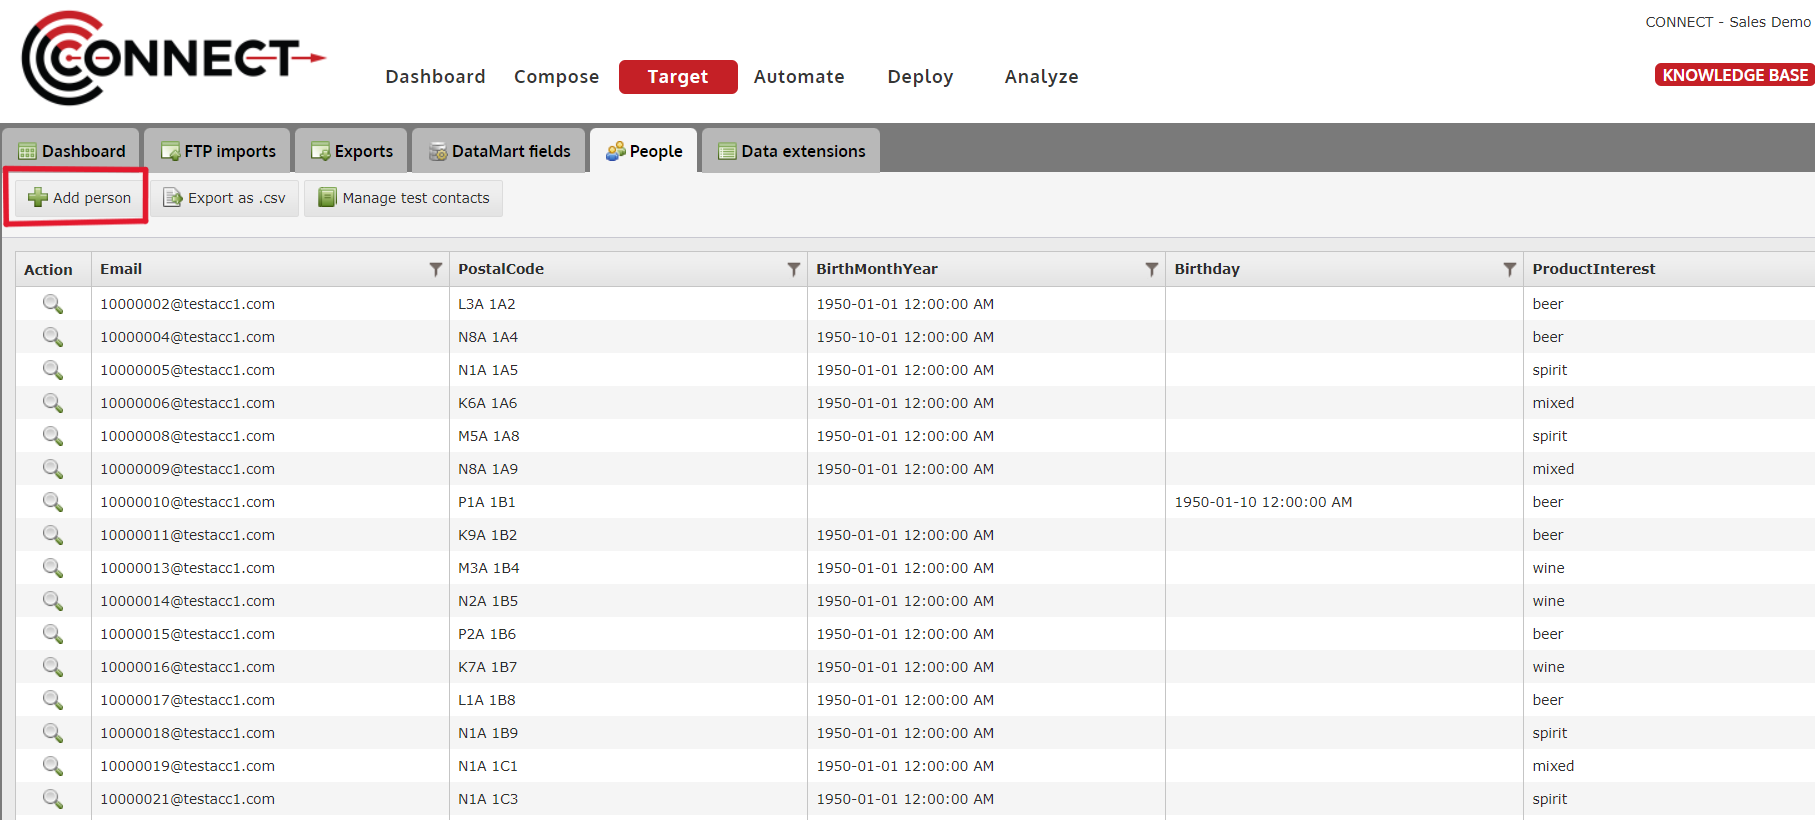
2. Next, click on the "Add Person" button
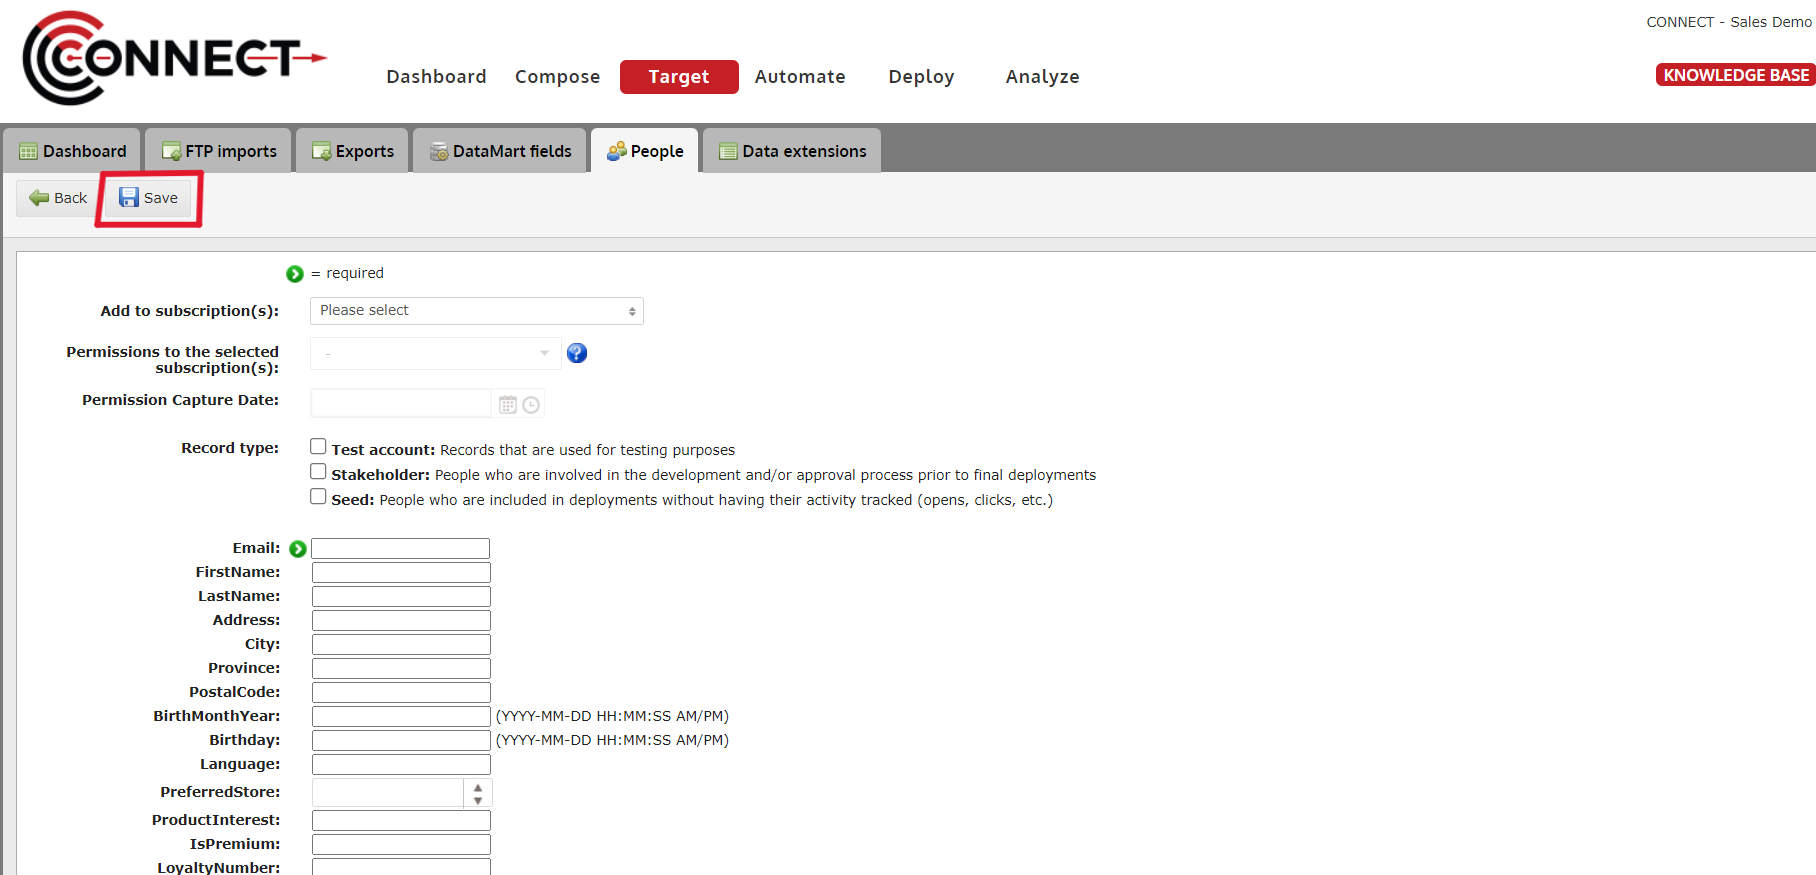
3. Select the Subscription(s) you would like to add the record to

4. Select the permission level of the record you are adding

5. OPTIONAL: Select the record type of the record you are adding
For a definition on Record Types, click here.

6. Fill out the Field Information of the Record you are Adding
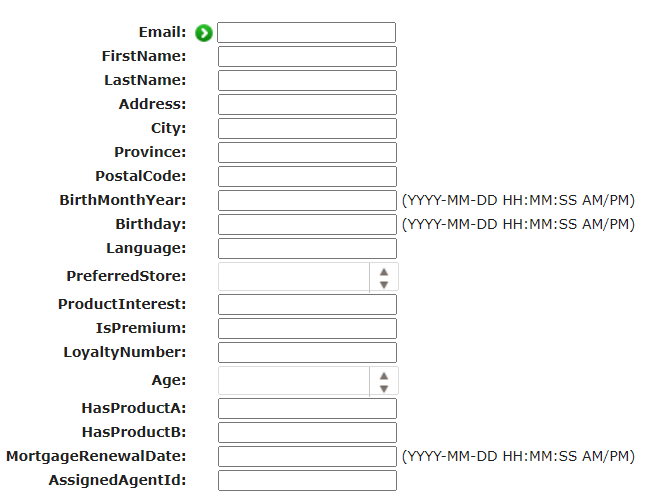
Note: Only the Identifier field is mandatory in this process. It will be flagged with a green indicator.
7. Click the "Save" button, once finished
How to Upload Records as Stakeholders, Test Accounts and Seeds
Throughout CONNECT, you will see references to three different records types: Stakeholders, Test Accounts and Seeds.
In this article, the process for uploading these records and the recommended uses for each are discussed.
1. Begin uploading the list of records you would like to assign as one of the record types
- If you need instructions on how to upload a list file, click here.
2. During the list upload process, click on "Additional options" to reveal the record type options

3. Test Accounts
- Test Accounts are defined in CONNECT as email addresses used solely for testing purposes.
- The might be Gmail or Hotmail accounts that would be used to see how a campaign is rending in different email clients.
- They can also be individuals who want be included in all testing deployments such as the Campaign Manager.
4. Stakeholders
- Stakeholders are defined in CONNECT as individuals who follow a campaign from start to finish and wish to be included in the process.
- You can add stakeholders to any testing that is being performed on a campaign and you can include them in the final deployment
- For a company, Stakeholders might be department leaders or managers. For an agency, Stakeholders might be account managers or key client contacts.
- You may include Stakeholders at any time, so it is important to only choose to add them to a deployment/test when you are ready for them to see the campaign
5. Seed Lists
- Seed lists are similar to stakeholders, however this separation is provided as Seed lists can only be used in final deployment and are added in with the regular customers.
- Seed lists tend to include executives and other individuals who wish to see final deployment as the customer sees it.
- Note: Records flagged as a Seed List will not be included in the final metrics.
How to set up a FTP Import
FTP Imports provide a simple solution to automating your data imports. This can be effective for pushing data from your CRM system or another tool that collects contacts into CONNECT. Follow the tutorial below to set-up your first FTP Import.
Note: In order to access the FTP Import's sub folder and begin dropping files, you will need your CONNECT FTP credentials which were provided when you were on boarded. If you need help retrieving these credentials, please submit a support ticket or email support.
Tutorial
Please note: To better view the tutorial, click the full screen icon  .
.
How to edit a FTP Import task
Using segments is not only a great way to target specific groups of contacts but it's also a great way to retrieve data from CONNECT for use outside of the application. This tutorial will help walk you through how to export a segment using our Exports feature.
Tutorial
Please note: To try out the feature, click the full screen icon in the tutorial.