Segmentation
- How to Create a Segment with one Field
- How to Create a Segment with Multiple Fields
- How to Segment by Contact Source
- How to Target Contacts Based on their Permission Level
- How to Target Contacts using Email Behaviour Segmentation
- How to Use Segments for Exporting Records
- How to export a segment
- Segmentation Operators by Field type
How to Create a Segment with one Field
Segmenting allows you to target a specific group in your database and send relevant content to them. This tutorial will demonstrate how to segment your database with one value.
1. Click the Create Segment button
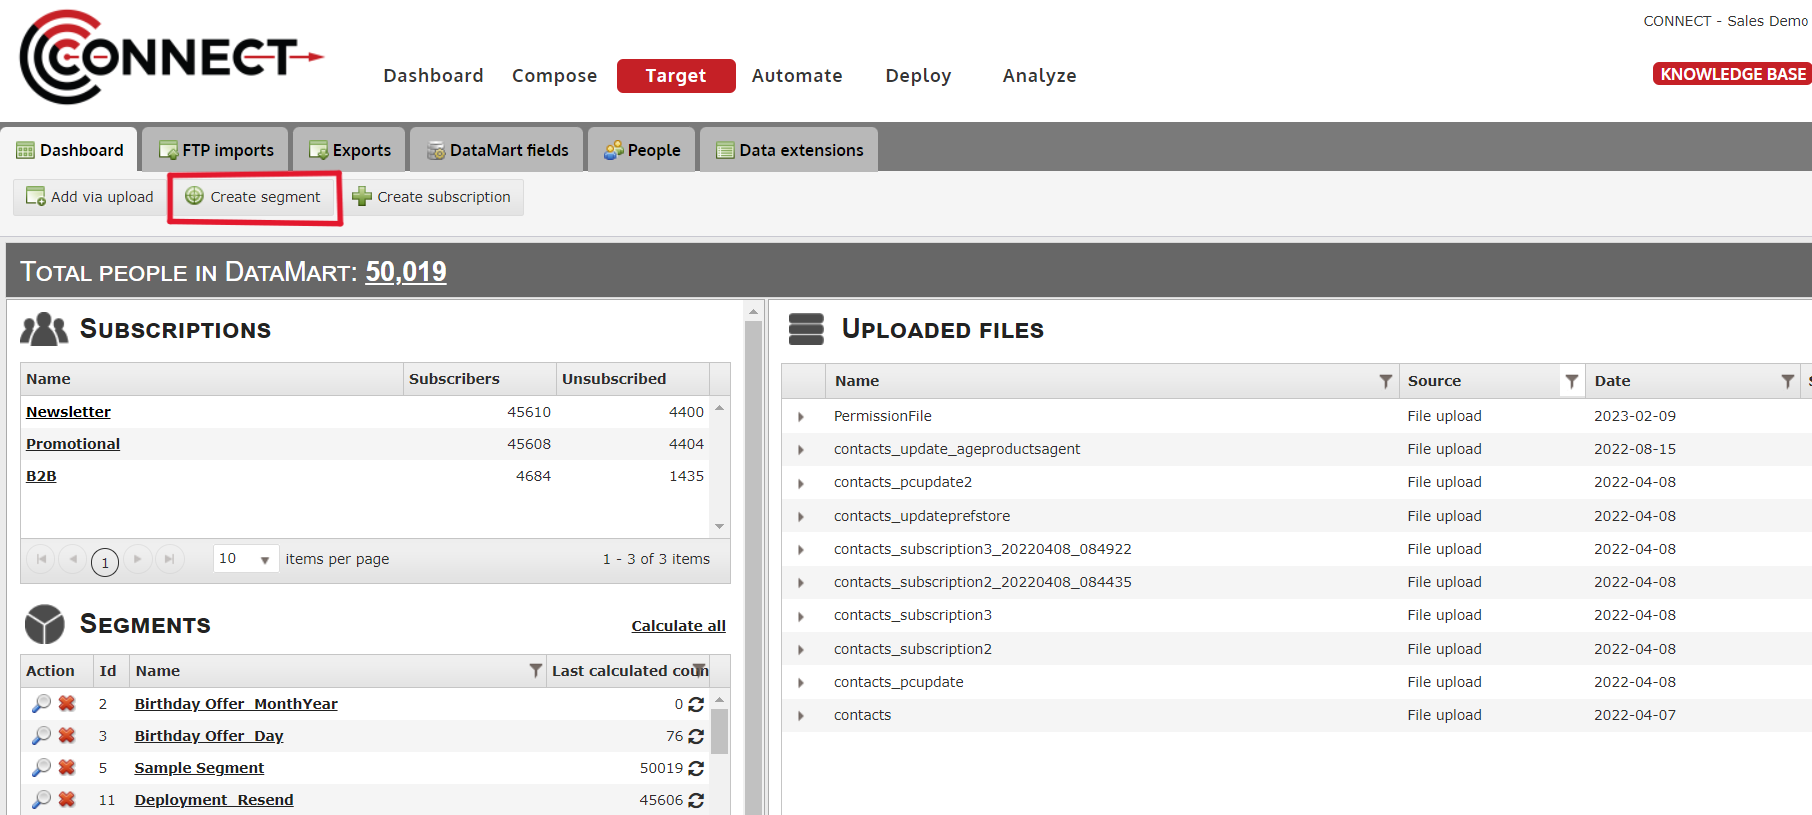
2. Type in a Segment Name
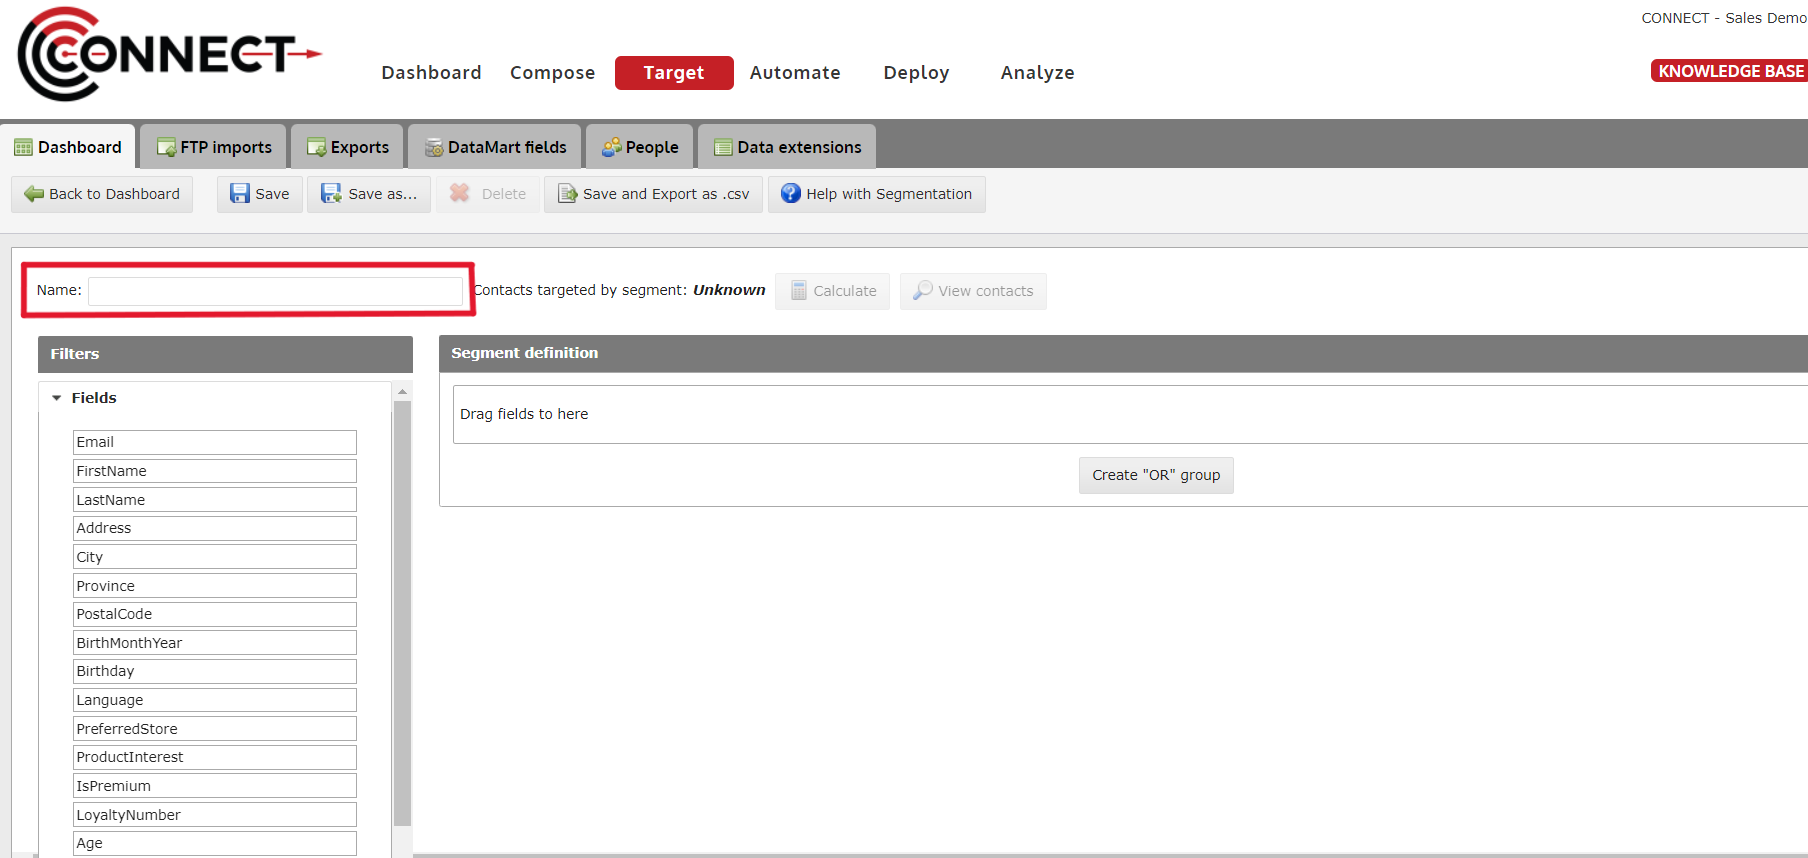
- TIP: Use a name that helps describe the segment (ie. Toronto Residents Over 50) OR a name that matches the message you will be using it with (ie. Newsletter_Jan 2012).
3. Drag the first Field into the Segment Definition Pane
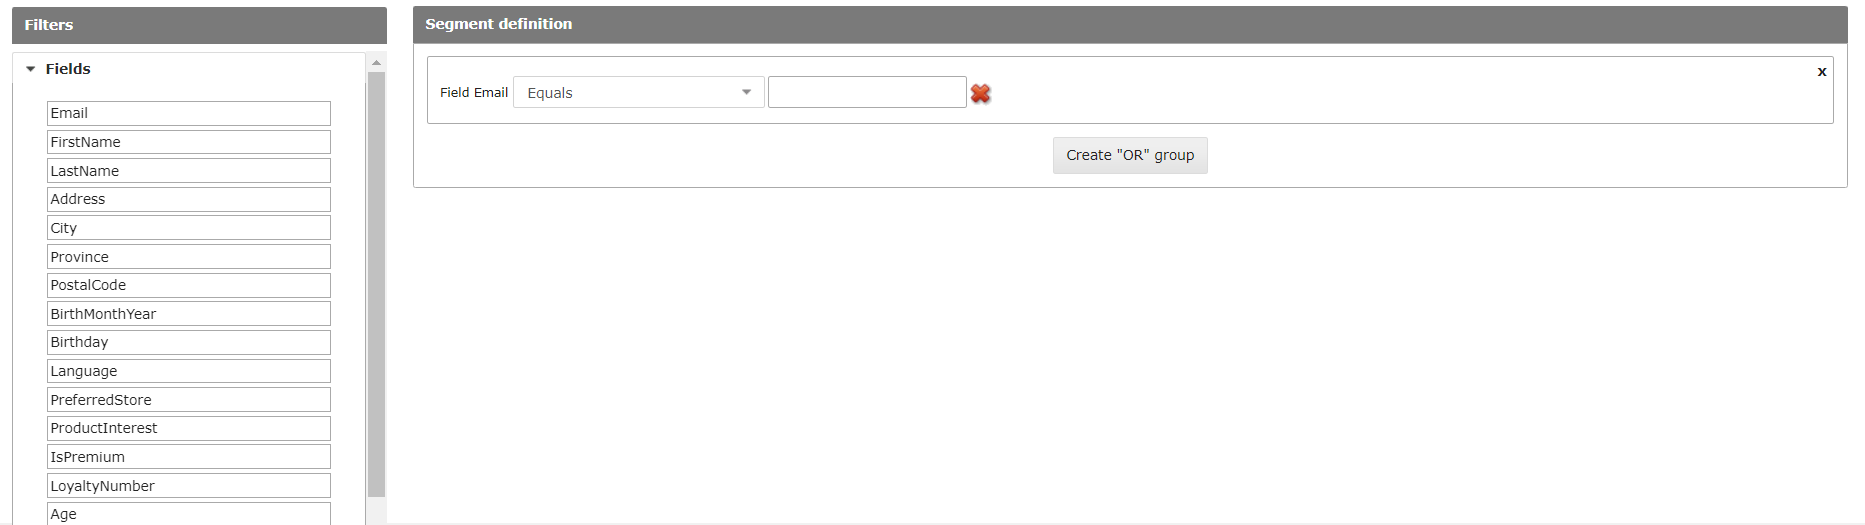
4. Select the Operator for the Field
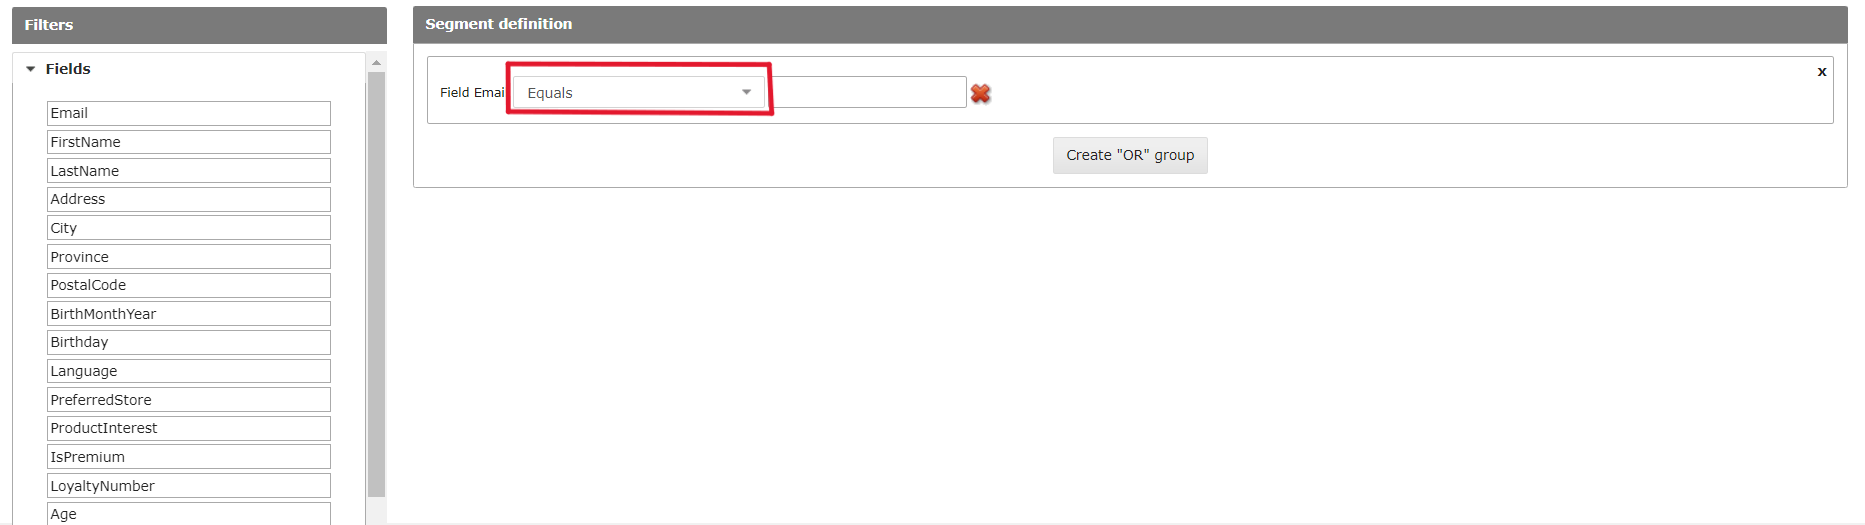
5. Type in the Value you wish to Segment on
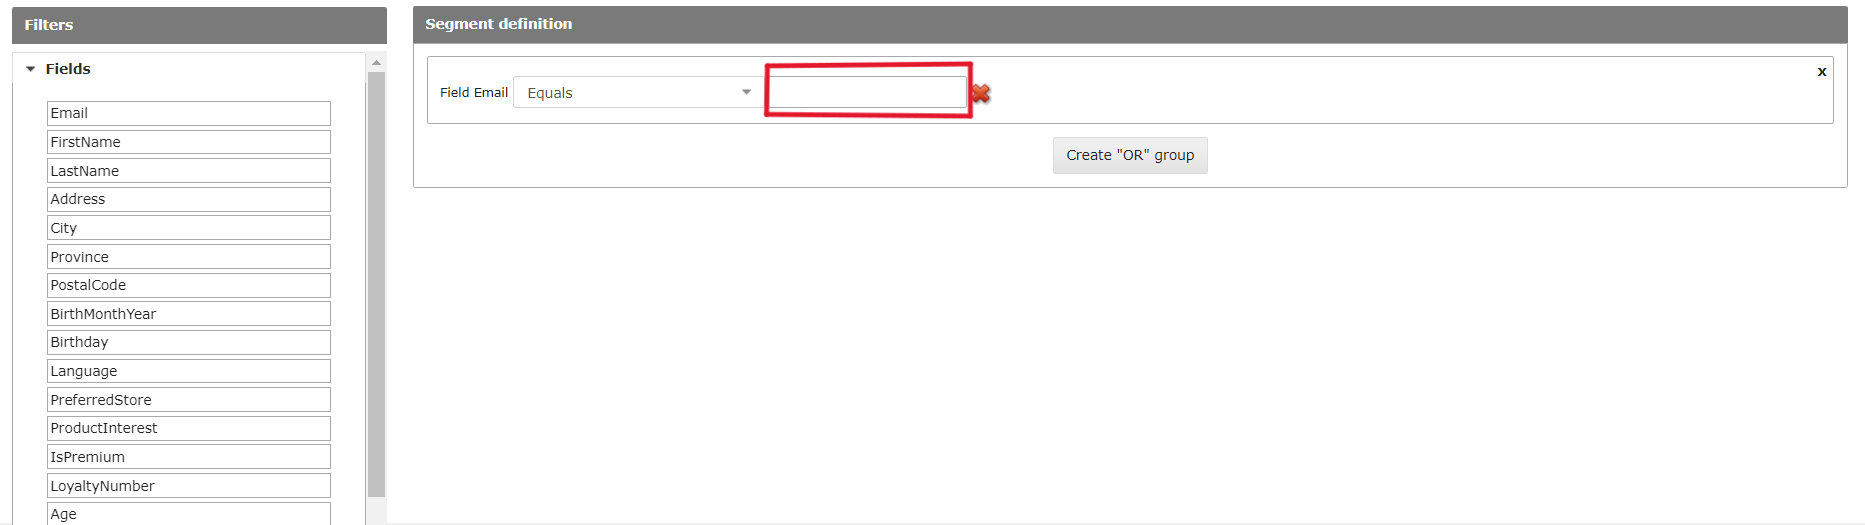
6. OPTIONAL: Verify the Record Count by clicking Calculate
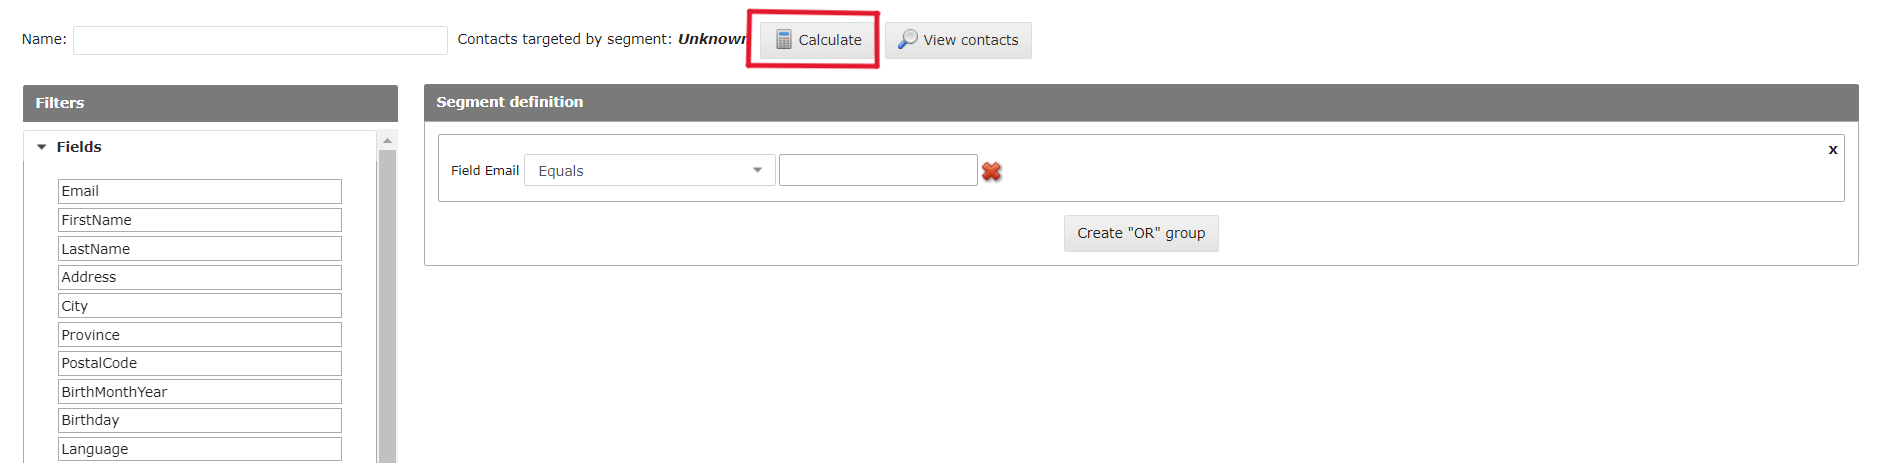
- NOTE: If you find the Record Count to be too high or too low, double check that the value being used matches the data in your DataMart.
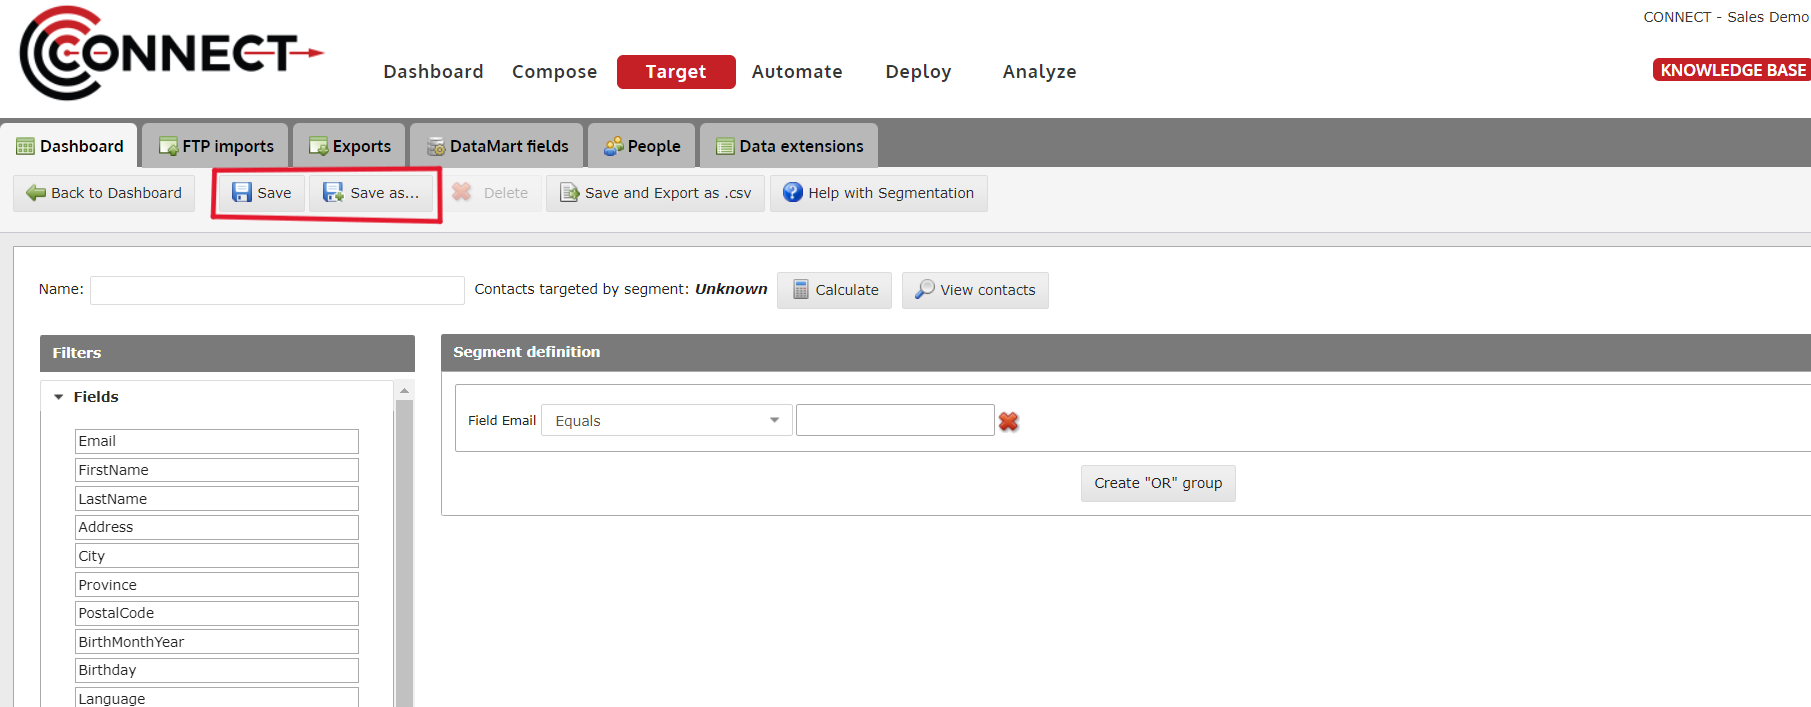
7. Click Save Segment to Finish
How to Create a Segment with Multiple Fields
Learn how to create multiple AND/OR statements in a segment and hone in on those specific customers you wish to target.
1. Follow Steps 1 - 5 in "How to Create a Segment with one Field"
How to Create a Segment with one Field
2. Creating an "AND" group

1. Drag the additional field(s) you wish to add into the group, on top of the existing fields. This will create an AND group.
2.1. Creating an "AND" group

2. Type in the Value you wish to Segment on. Click Save Segment to finish.
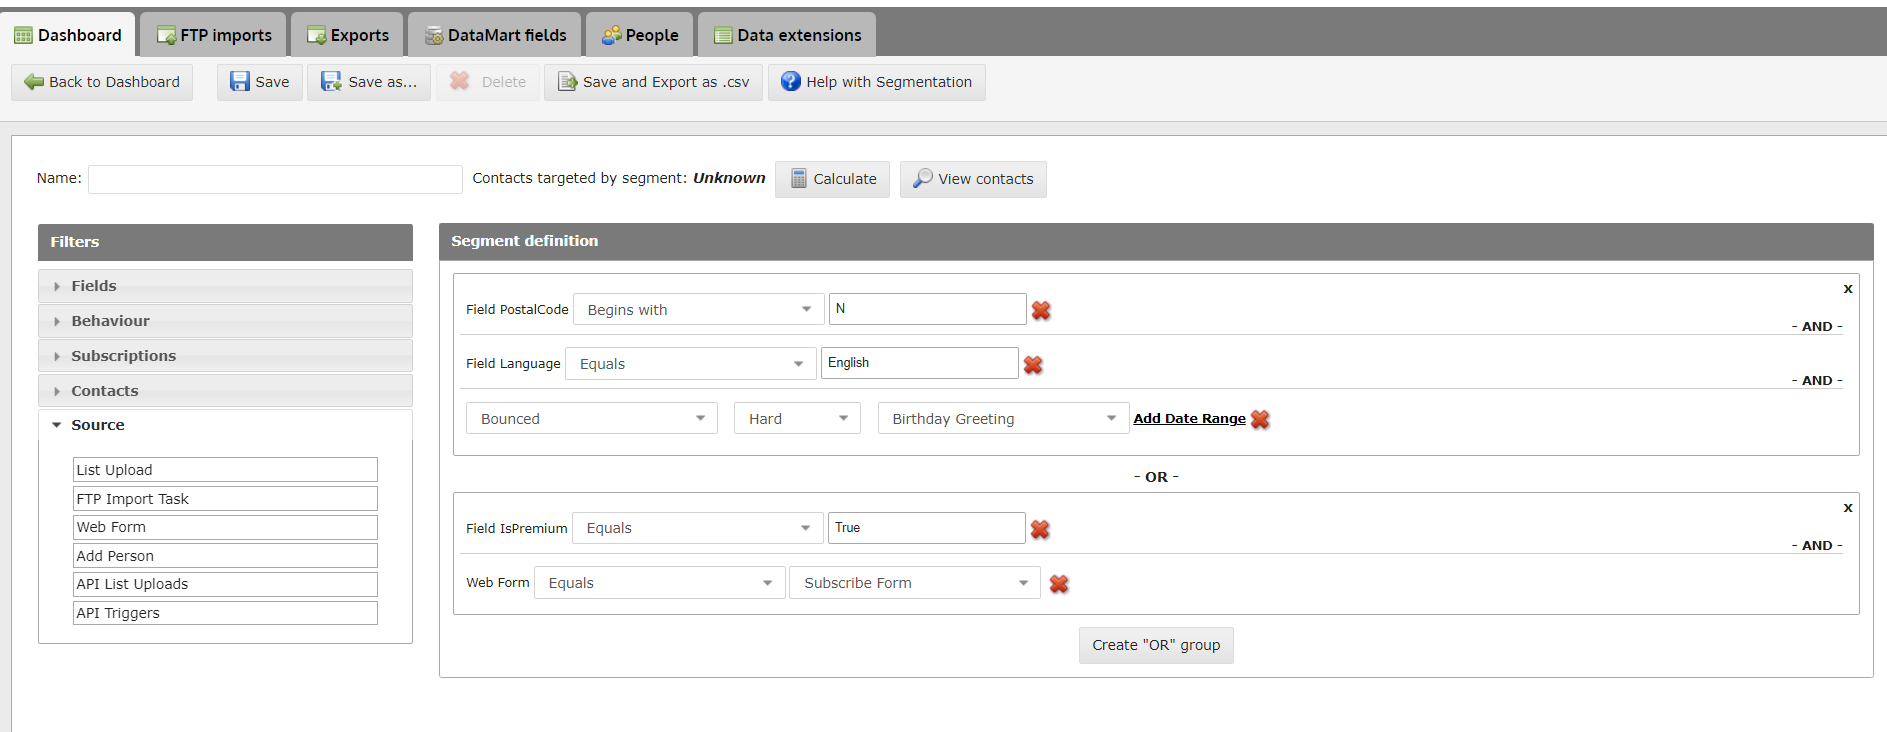
3. Creating an "OR" Statement

1. Click on the "Create OR Group" button.
3.1. Creating an "OR" Statement
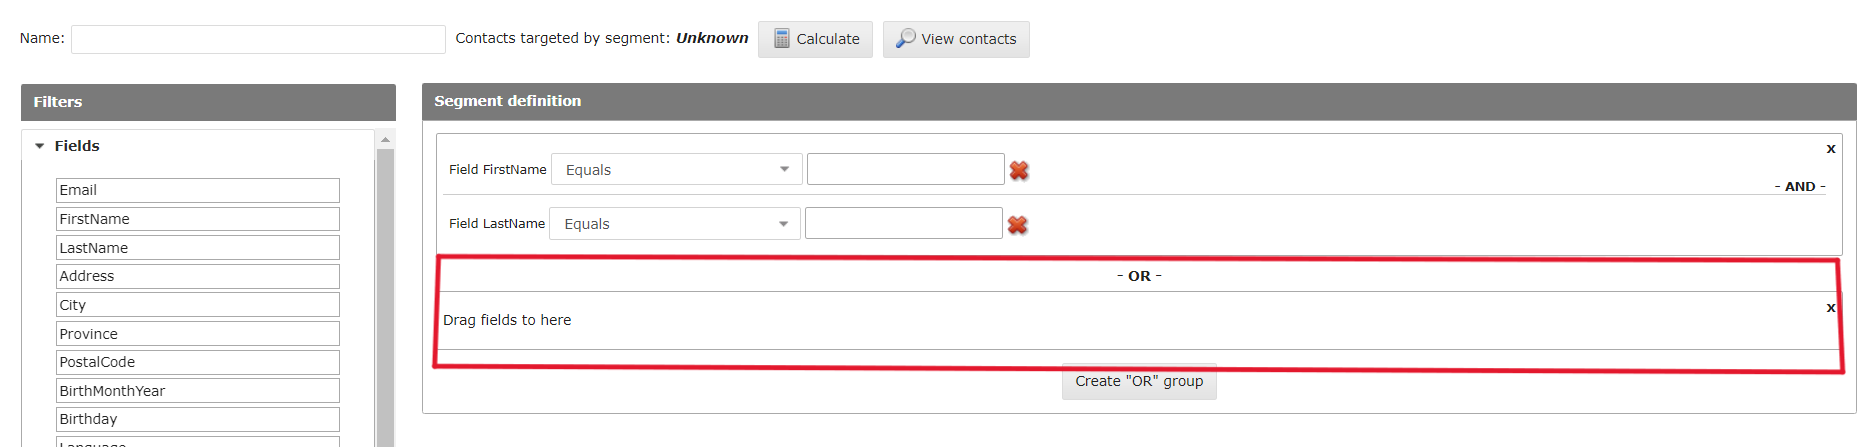
2. Drag a field into the new area to create the "OR" statement.
3.2. Creating an "OR" Statement

3. Type in the Value you wish to Segment on. Click Save Segment to finish
How to Segment by Contact Source
Segmentation now offers you the ability to target your contacts based on sources they may have entered your DataMart through.
These include - List Upload - FTP Import Task - Webform - Adding a single contact - API List Upload

Simply drag and drop the source type to your segment logic, select the operators "equal" or " does not equal" and the select the source name.
1. Source Definitions
- List Upload Contacts that were included Min a manual CSV upload through the target dashboard.
- FTP Import Task Files Contacts that were uploaded automatically via ftp FTP import task or a specific file picked up by a FTP import task.
- Webform Contacts that were captured by a specific web form built in Connect.
- Add person Contacts that were uploaded into the DataMart by using the Add a person button on the People tab on the Target screen or through the Contacts endpoint on the Restful API.
- API List Upload Contacts that were uploaded using the Connect Restful API List endpoint.
How to Target Contacts Based on their Permission Level
This feature allows you to target contacts based on their permission level for a specific subscription.
1. Name your Segment
- In "Create new segment ", you can now target recipients from a specific subscription based on their permission level
2. Click on Subscriptions
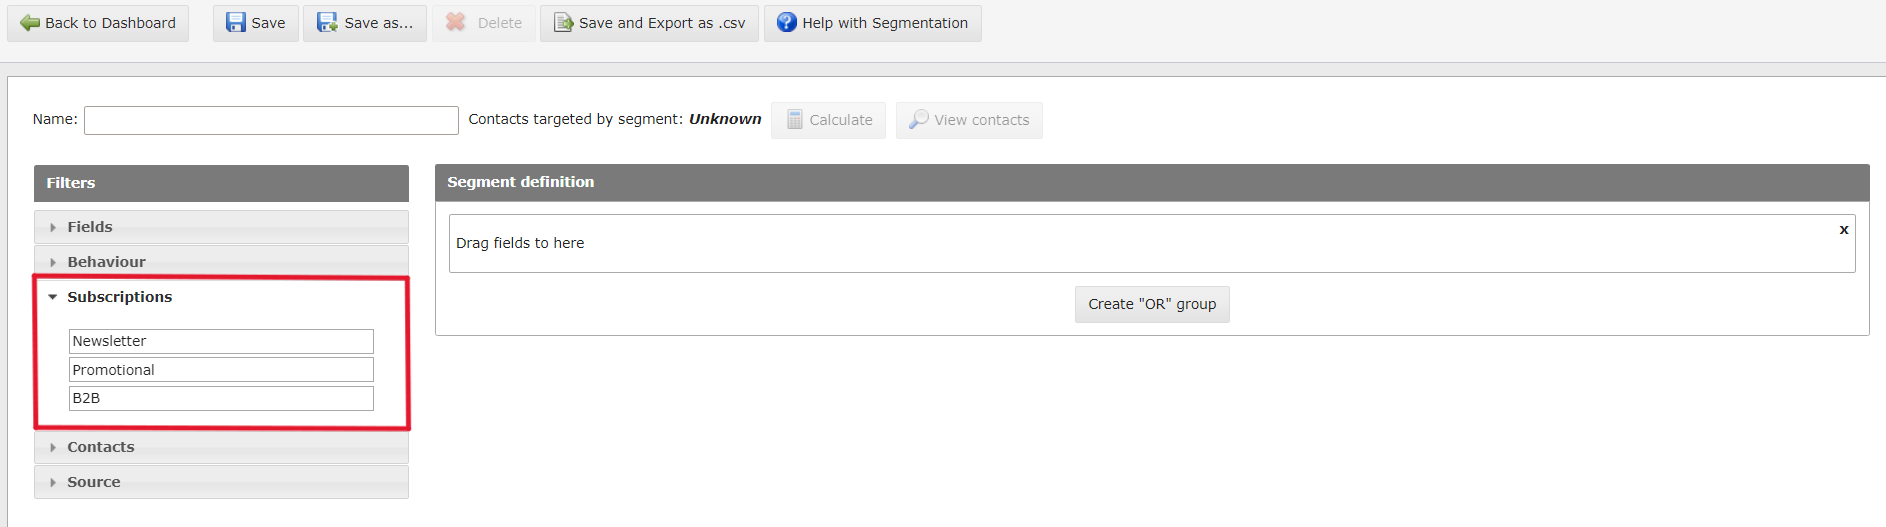
3. Drag and drop it in the Segment
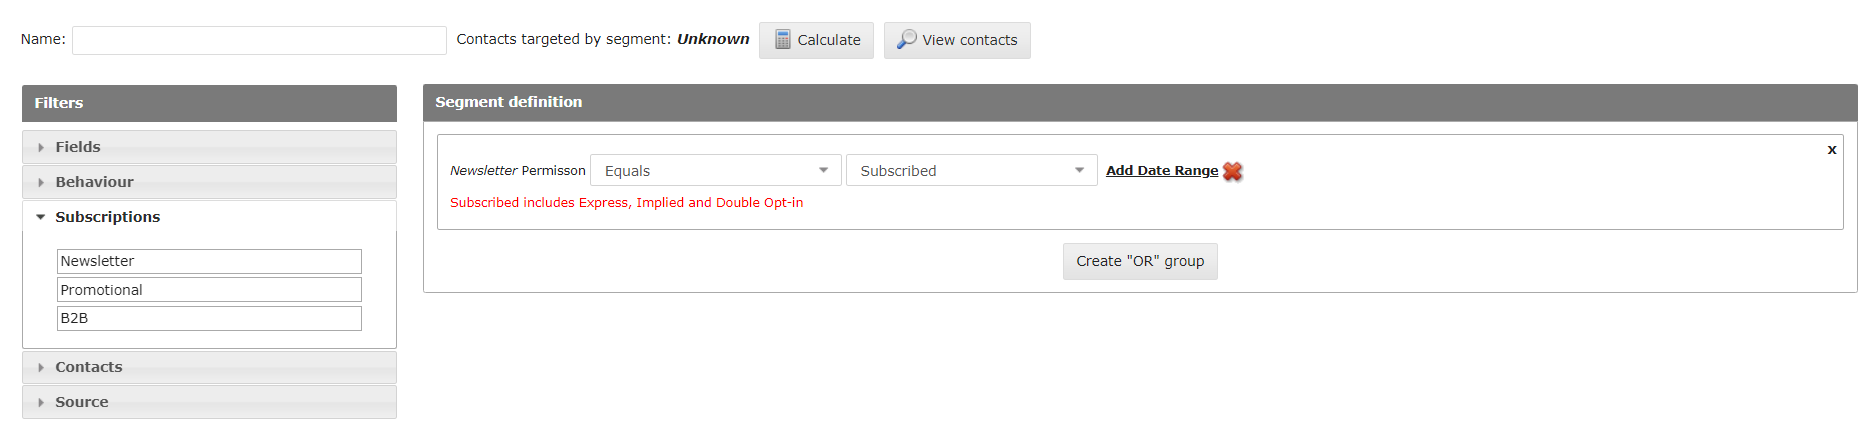
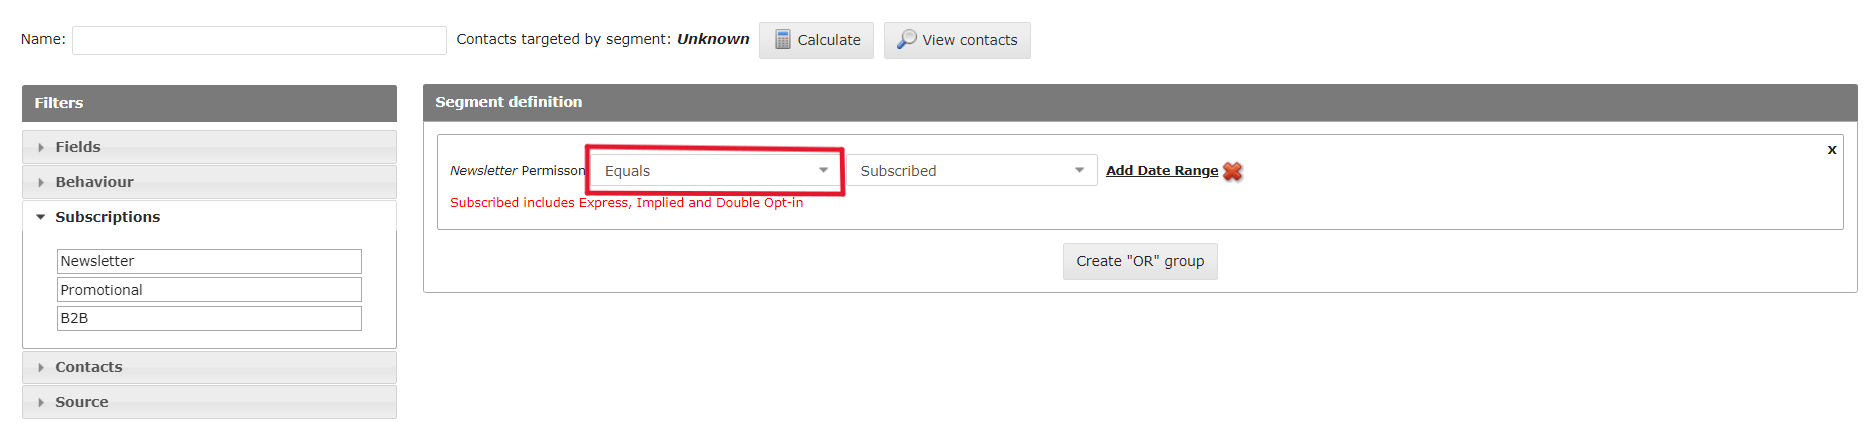
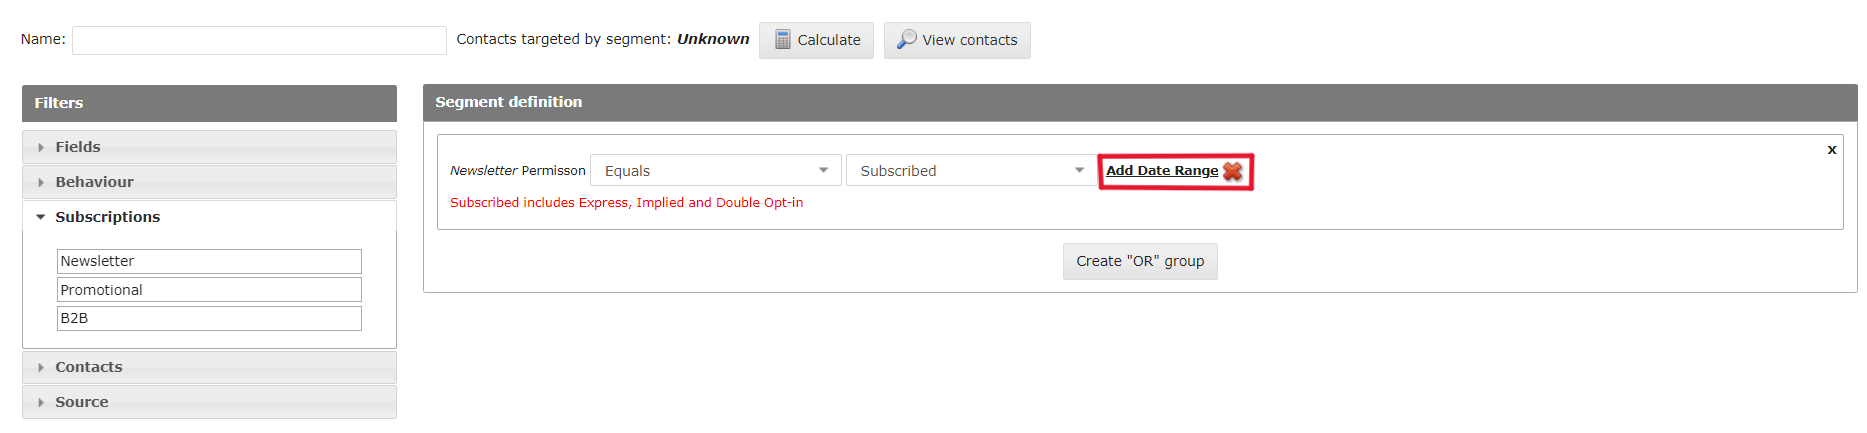
4. Select the Operator
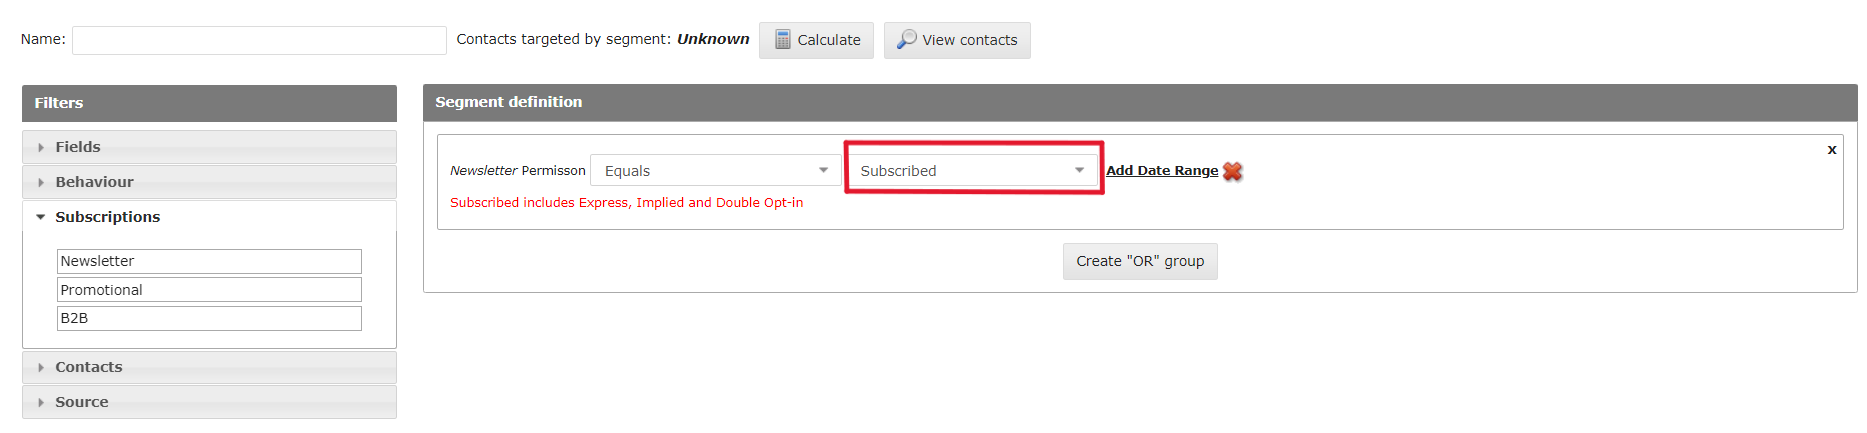
5. Select the Permission Level
6. Click on Add a Date Range
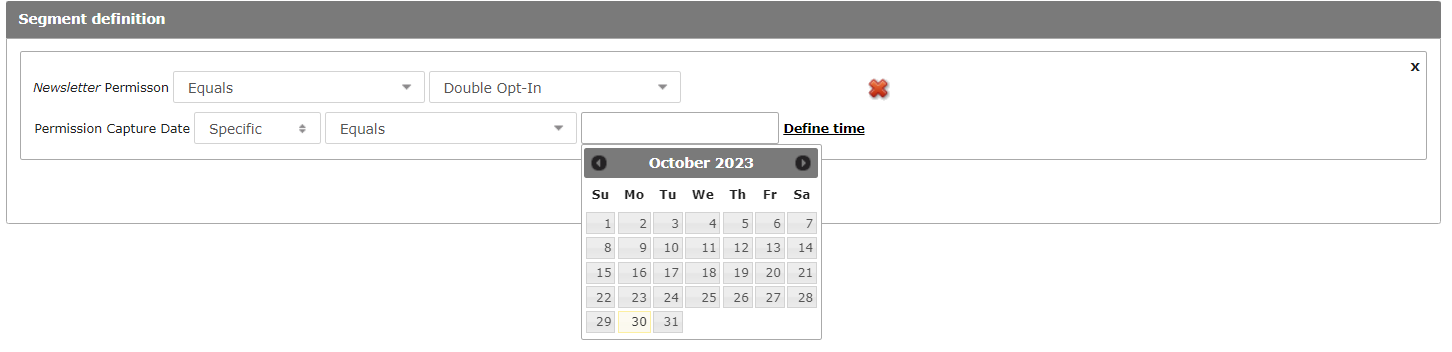
7. Select when it was Last Updated

8. Date Picker
9. "Relative" Date Option
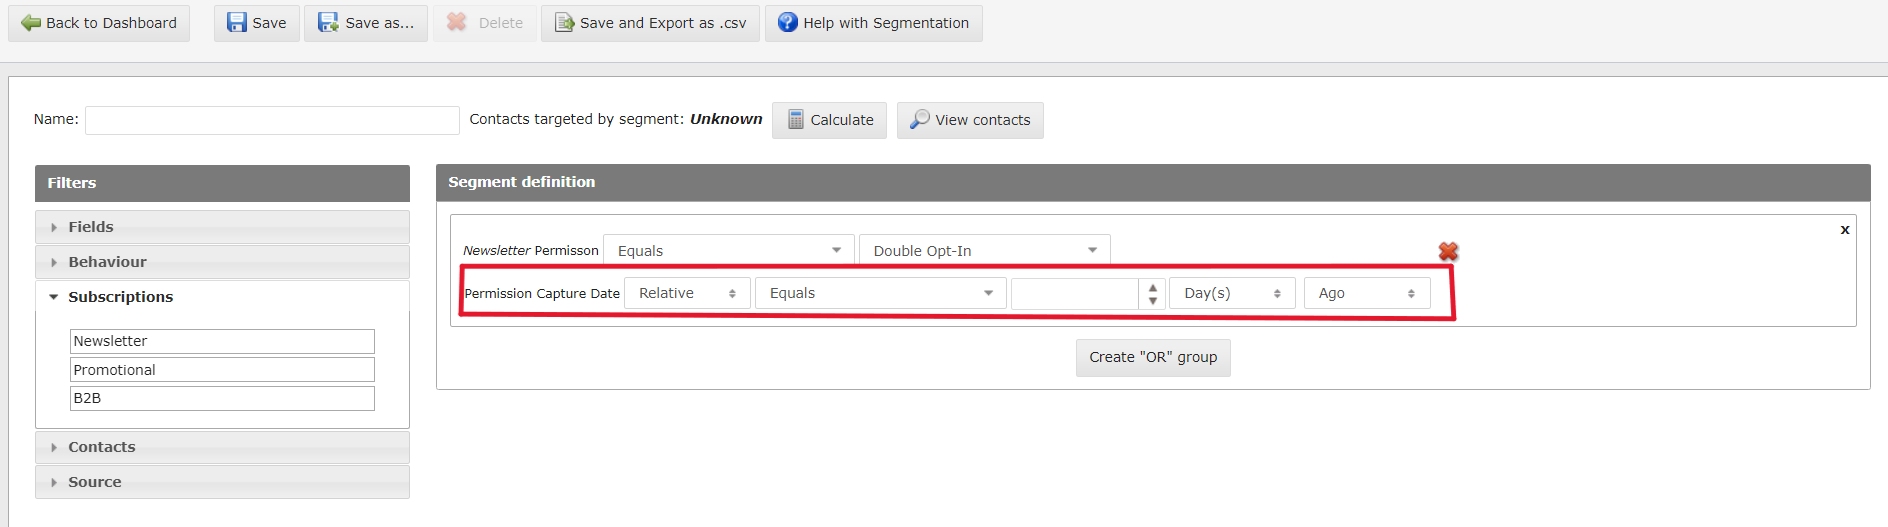
- Relative date option can be selected allowing the user to set a relative date instead of a specific one
10. Exporting Recipient from a Subscription List
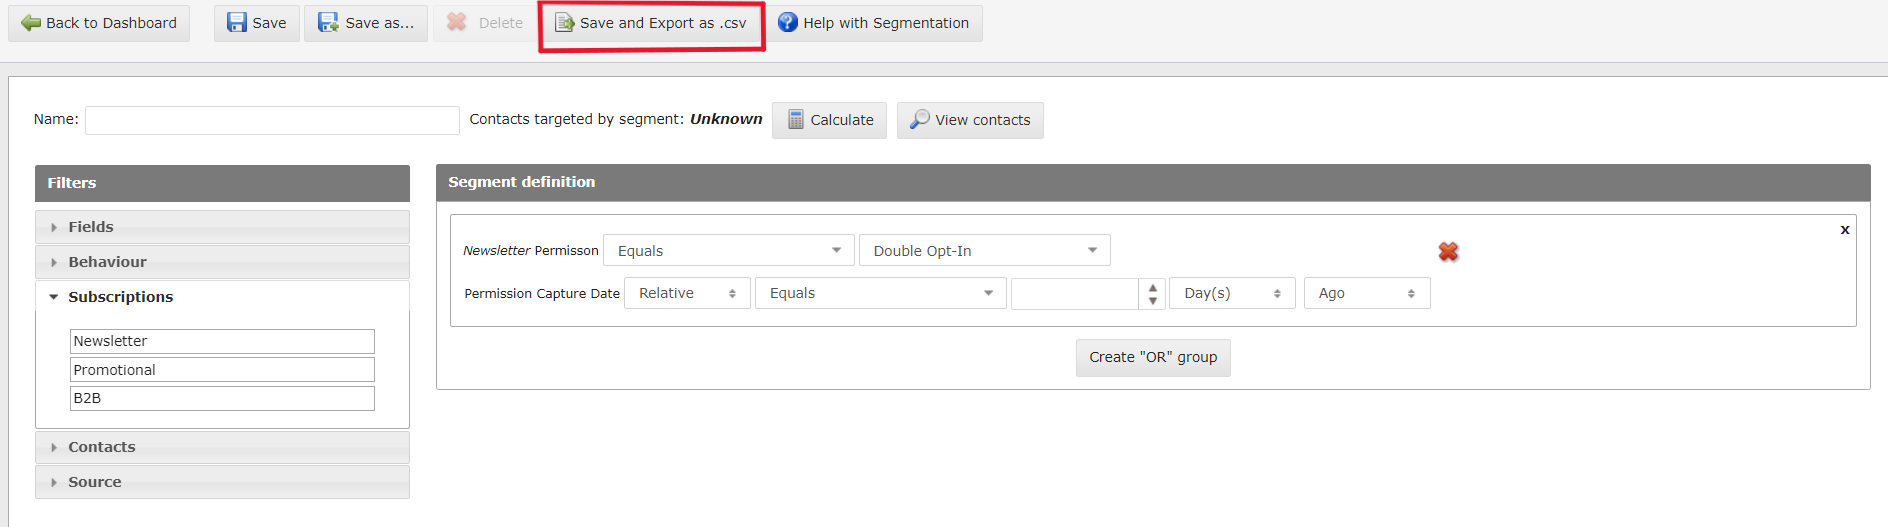
You are able to export the list of users that have a specific permission level within a date range.
- Select the desired option
- Click on " Save and export as .csv"
You can now pick which fields you want included in the file and can also add permission data for specific subscriptions.
11. Select the Fields for Export
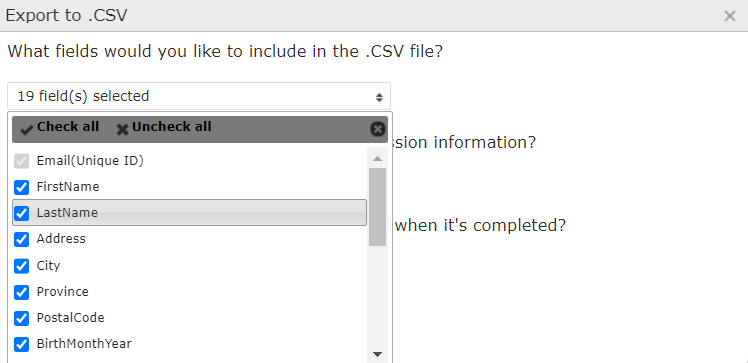
- You can select any field you would like to have included in your export by checking or unchecking the field list.
12. Include permission level in the Export
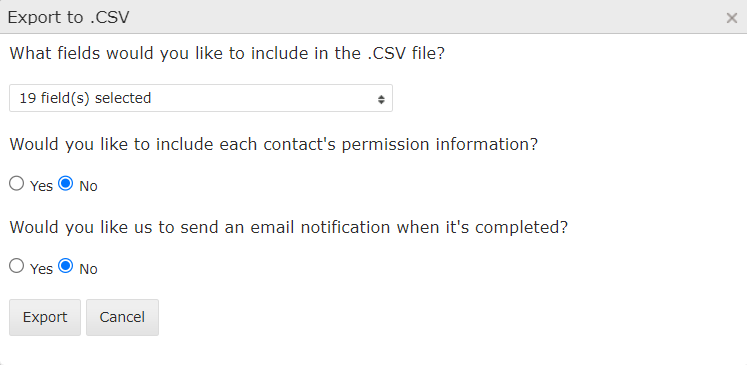
In order to include , the permission information in your export , please follow the below steps :
- Check the "yes" radio button
- Make sure the desired subscription is selected.
- Finally, click on Export.
How to Target Contacts using Email Behaviour Segmentation
Target inactive contacts to send a reactivation campaign and increase email program participation or target contacts who did or did not perform the required action in an email communication.
Email behaviour segmentation allows you to use your incoming email metrics to target your contacts based on their engagement with your email program.
1. To Begin
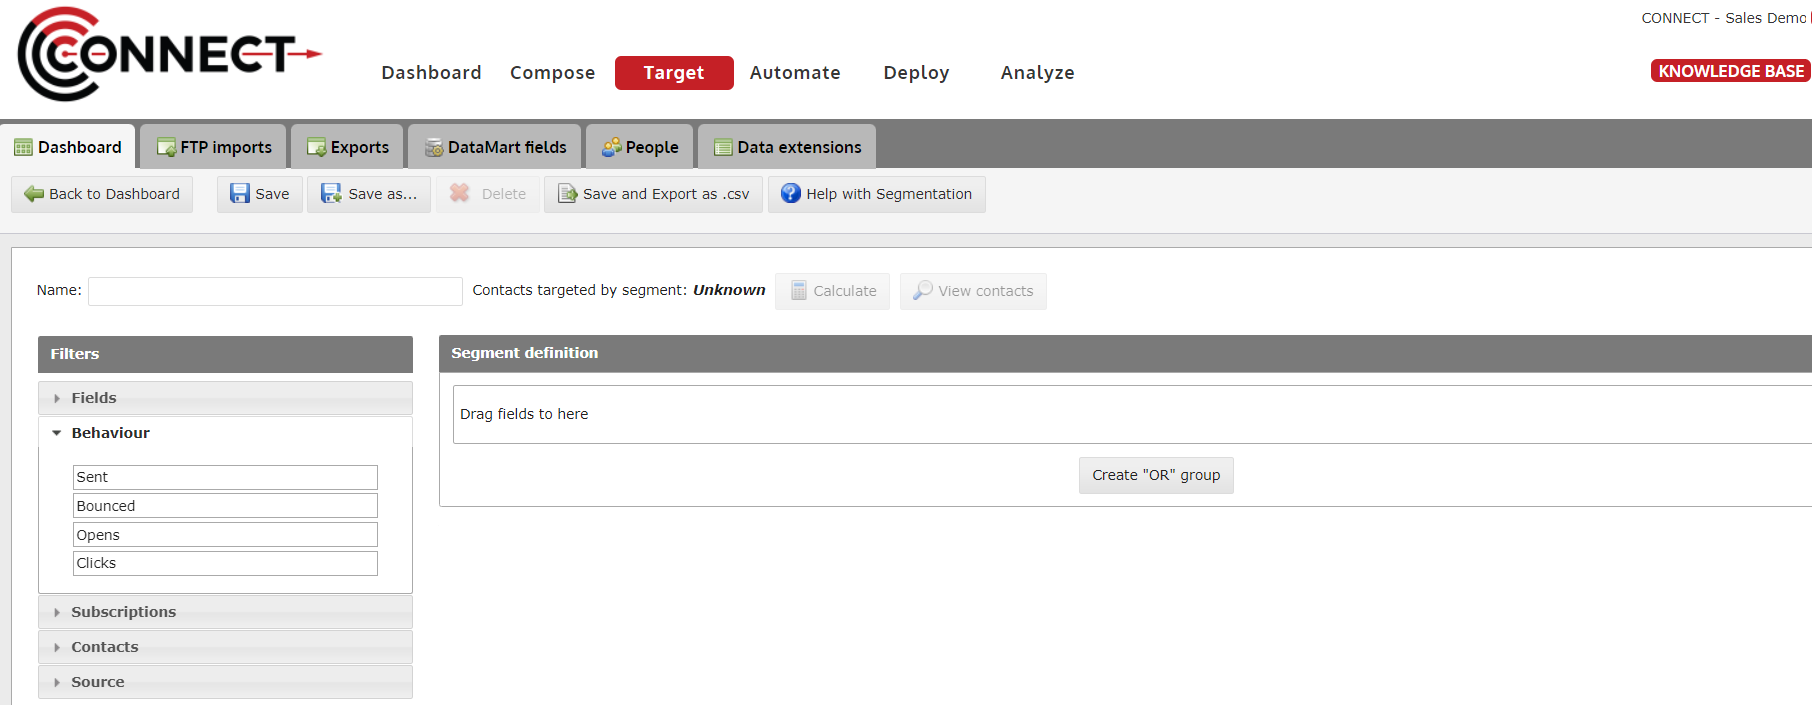
To begin creating a segment with Email behaviour criteria, follow these steps:
- Target screen
- Create segment
- Behaviour
2. Campaign and Deployment Selection
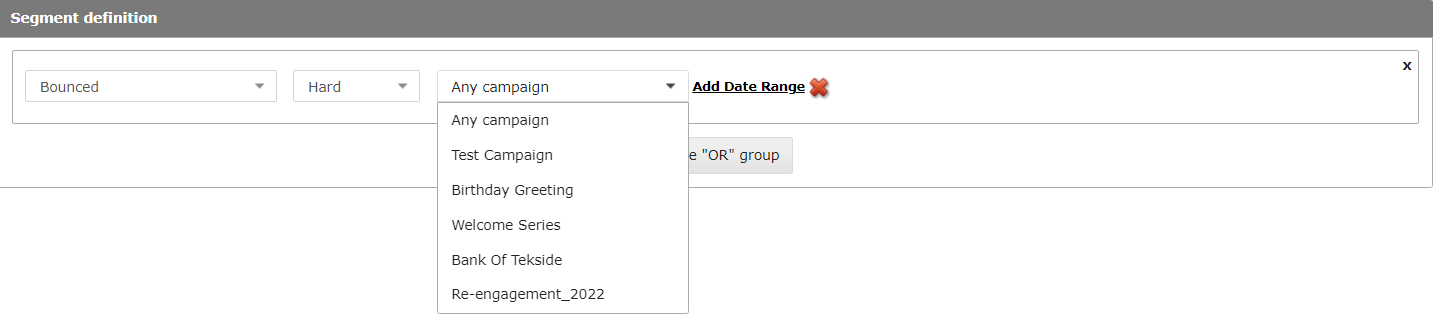
On all of the behaviour segmentation selectors, you will be able to target based on the following:
- Any
- Any campaign/deployment - This will target contacts that have performed the selected behaviour across any campaign or deployment that has been deployed.
- Campaigns
- Selecting a campaign will allow you to target a specific deployment or any deployment. When you select a campaign, you are only shown deployments that are assigned to that campaign.
3. Applying a Date Range

Adding a date range to your behaviour criteria will allow you to reduce the scope of your segment so that the data you are using to target your contacts is more relevant. The "Add Date Range" option is available for all behaviour selectors.
Options
- Today - This is a dynamic selection that will target contacts that performed the selected behaviour between 12:00:00AM and 11:59:59PM of the current day. This means that everyday, a different group of contacts will be targeted. This is calculated when the segment is used in a deployment or automated program.
- Not Today - This is a dynamic selection that will target contacts that performed the selected behaviour outside of 12:00:00AM and 11:59:59PM of the current day. This means that everyday, a different group of contacts will be targeted. This is calculated when the segment is used in a deployment or automated program.
- In the past - This is a dynamic selection that will target contacts that performed the selected behaviour between the current day and X days before the current day. If 5 days is selected and the current day is the 25th, all contacts that performed the selected behaviour between 21st-25th will be targeted. This means that everyday, a different group of contacts will be targeted. This is calculated when the segment is used in a deployment or automated program.
- After - The user will provide a specific date and time and the segment will target all contacts that performed the selected behaviour after that specific date/time. Contacts that performed the selected behaviour on the exact selected date/time will be omitted.
- After or equal to - The user will provide a specific date and time and the segment will target all contacts that performed the selected behaviour after that specific date/time or on the exacted selected date/time.
- Before - The user will provide a specific date and time and the segment will target all contacts that performed the selected behaviour before that specific date/time. Contacts that performed the selected behaviour on the exact selected date/time will be omitted.
- Before or equal to - The user will provide a specific date and time and the segment will target all contacts that performed the selected behaviour before that specific date/time or on the exacted selected date/time.
- Between - The user will provide two specific dates and times and the segment will target all contacts that performed the selected behaviour in between those date/times. Contacts that performed the selected behaviour on the exact selected date/time will be omitted.
- Not between - The user will provide two specific dates and times and the segment will target all contacts that performed the selected behaviour outside of those date/times. Contacts that performed the selected behaviour on the exact selected date/time will be omitted.
4. Sent
- Sent
- This lets you target contacts that the system attempted to send to.
- You can target anyone that's been sent any campaign, a specific campaign or a specific deployment.
- Not Sent
- This lets you target contacts that the system did not attempted to send to.
- You can target anyone that hasn't been sent any campaign, a specific campaign or a specific deployment
5. Bounced
- Bounced - This lets you target contacts that the system received a bounce message for the selected reason.
- Did not bounce - This lets you target contacts that the system did not receive a bounce message for.
- Reasons
- Hard - Any contacts that receive this bounce message will be suppressed from further mailing.
- Soft - Any contacts that receive this bounce message most likely had a full inbox or were out-of-office when sending to them. They will not be suppressed from future deployment but they did not receive the deployment where the bounce message was collected.
- Technical - Any contacts that receive this bounce message is usually due to a technical issue like server downtime.
- Complaint - This bounce is generated by the contact when they flag the message they received as "Spam" or they click "Complain". Contacts with this bounce message will be suppressed from all future deployment.
6. Opens
- Opened - This lets you target contacts that have opened any campaign, a specific campaign or a specific deployment.
- Did not open - This lets you target contacts that have not opened any campaign, a specific campaign or a specific deployment.
- Open Rate - This lets you target contacts that have opened during a campaign a percentage or number of times within a data range
7. Clicks
- Clicked - This lets you target contacts that have clicked any campaign, a specific campaign, a specific deployment or a specific link within a deployment.
- Did not click - This lets you target contacts that have not clicked any campaign, a specific campaign, a specific deployment or a specific link within a deployment.
- Open Rate - This lets you target contacts that have clicked a campaign a percentage or number of times within a data range.
How to Use Segments for Exporting Records
Segmentation in CONNECT provides the ability to create any slice of data you wish using the data you have provided.
Sometimes you might want to export this data for external reasons or to manipulate the data and re upload that group of people back into the tool. Below are instructions on how to do this.
1. Set up your Segment with the Criteria you need to Export Records
- If you are unsure on how to use segmentation, click here.
- Tip: You can use segmentation to export a specific list you have already uploaded, by dragging over "List Upload" under the "Source" drop down on the left.
2. Once you have the segment you wish to export, click "Save and Export as .csv" at the top
How to export a segment
Using segments is not only a great way to target specific groups of contacts but it's also a great way to retrieve data from CONNECT for use outside of the application. This tutorial will help walk you through how to export a segment using our Exports feature.
Tutorial
Please note: To try out the feature, click the full screen icon  in the tutorial.
Segmentation Operators by Field type
When creating segments in UMPIRE, different operators will appear and will allow you to manipulate the different kinds of data differently.
These operators are pre-determined by the field type of the field you are about to segment on.
Below are descriptions of each operator for each field type. For help with creating a segment, click here.
1. Text Fields
-
Equals/Does not equal
-
The "Equals" operator allows you to target a specific value in that field. In this example, you would want to use the entire Email address EXACTLY as it appears in the DataMart (eg. Email Equals support@inboxmarketer.com).
-
The "Does not equal" operator will ignore anyone with the value you've indicated (eg. Email Does not equal support@inboxmarketer.com, will return everyone except individuals with the email address "support@inboxmarketer.com").
-
-
Begins with
-
This operator allows you to target records with values that begin with the value you've entered.
-
For example, if you wanted to target any email address that starts with the word "support", you would select "Begins with" as your operator and type in "support" in the text box.
-
-
Contains/Does Not Contain
-
The "Contains" operator allows you to search the field's data for a value and return records that have that value somewhere in the whole value.
-
For example, if you wanted to target any individuals with a Gmail address, you would select the "Contains" operator and type in "@gmail.com" in the text box.
-
-
If you selected "Does not contain" in this example, you would be targeting all email address except ones that are @gmail.com
-
-
Is empty/Is not empty
-
The "Is Empty" operator is slightly different from the rest. This operator targets records that do or do not have a value for the chosen field.
-
For example, if I wanted to target individuals who I do not have an email address for, I would select "Is empty" for my operator.
-
-
In reverse, if i wanted to target records that I do have an email address for, then I would choose "Is not empty".
-
Number Fields
-
Equals/Does not equal
-
The "Equals" operator allows you to target a specific value in that field. In this example, you would want to type in the Account Balance EXACTLY as it appears in the DataMart
-
(eg. Account Balance Equals 991234).
-
-
The "Does not equal" operator will ignore anyone with the value you've indicated
-
(eg. Account Balance Does not equal 991234, will return everyone except individuals with the Account Balance "991,234").
-
-
-
Is greater than/Is greater than or equal to
-
The "Is greater than" operator allows you to target records with number values that are greater than (or exactly) the value you have provided.
-
The operator "Is greater than" excludes the exact value you've entered in the text box.
-
For example, if I typed in the value 900,000, "Is greater than" will not target records who have an account balance of exactly 900,000. This includes decimal places (ie. Records with an Account Balance of 900,000.00005 would be targeted).
-
-
However, if I choose "Is greater than or equal to", it WILL target the records that have the exact value 900,000.
-
-
Is less than/Is less than or equal to
-
The "Is less than" operator allows you to target records with number values that are less than (or exactly) the value you have provided.
-
The operator "Is less than" excludes the exact value you've entered in the text box.
-
For example, if I typed in the value 900,000, "Is less than" will not target records who have an account balance of exactly 900,000.
-
-
-
However, if I choose "Is less than or equal to", it WILL target the records that have the exact value 900,000.
-
-
Is empty/Is not empty
-
The "Is Empty" operator is slightly different from the rest. This operator targets records that do or do not have a value for the chosen field.
-
For example, if I wanted to target individuals who I do not have an email address for, I would select "Is empty" for my operator.
-
-
In reverse, if i wanted to target records that I do have an email address for, then I would choose "Is not empty".
-
Date Fields
-
Equals/Does not equal
-
The "Equals" operator allows you to target a specific value in that field.
-
In this example, you would want to type in the Sign Up Date EXACTLY as it appears in the DataMart
-
(eg. Sign Up Date Equals 01/01/2013).
-
-
The "Does not equal" operator will ignore anyone with the value you've indicated
-
(eg. Sign Up Date Does not equal 01/01/2013 will return everyone except individuals with the Sign Up Date "01/01/2013").
-
-
-
Is after/Is after or equal to
-
The "Is after" operator allows you to target records with date values that are after (or exactly) the date you have provided.
-
The operator "Is after" excludes the exact date you've entered in the text box.
-
For example, if I typed in the date 01/01/2013, "Is after" will not target records who have their sign up date as exactly 01/01/2013.
-
-
-
However, if I choose "Is after or equal to", it WILL target the records that have the exact date 01/01/2013 in addition to the records that have a sign up date that falls after the given date.
-
-
Is before/Is before or equal to
-
The "Is before" operator allows you to target records with date values that are before (or exactly) the date you have provided.
-
The operator "Is before" excludes the exact date you've entered in the text box.
-
For example, if I typed in the date 01/01/2013, "Is before" will not target records who have their sign up date as exactly 01/01/2013.
-
-
However, if I choose "Is before or equal to", it WILL target the records that have the exact date 01/01/2013 in addition to the records that have a sign up date that falls before the given date.
-
-
Is today
-
This operator allows you to target records who have a date value that equals the current date.
-
Keep in mind, that each day, this operator and the next 4 (Is before/after this many days ago, Is before/after this many days from now) will cause the segment to change each day as the current date changes.
-
-
Is before this many days ago
-
This operator allows you to target records who have a date value that is before the current date minus the number of days given.
-
For example, if I wanted to target records who's Sign Up Date was before 3 days ago (today being 01/15/2013), I would select "Is before this many days ago" as my operator and type the value 3 in the text box.
-
This would give me all records who's sign up date is before 01/12/2013.
-
-
Is after this many days ago
-
This operator allows you to target records who have a date value that is after the current date minus the number of days given.
-
For example, if I wanted to target records who's Sign Up Date was after 3 days ago (In this example, today is 01/15/2013), I would select "Is after this many days ago" as my operator and type the value 3 in the text box.
-
This would give me all records who's sign up date was after 01/12/2013.
-
-
Is before this many days from now
-
This operator allows you to target records who have a date value that is before the current date plus the number of days given.
-
For example, if I wanted to target records who's Sign Up Date was before 3 days from now (In this example, today is 01/15/2013), I would select "Is before this many days from now" as my operator and type the value 3 in the text box.
-
This would give me all records who's sign up date was before 01/18/2013.
-
-
Is after this many days from now
-
This operator allows you to target records who have a date value that is after the current date plus the number of days given.
-
For example, if I wanted to target records who's Sign Up Date was after 3 days from now (In this example, today is 01/15/2013), I would select "Is after this many days from now" as my operator and type the value 3 in the text box.
-
This would give me all records who's sign up date was after 01/18/2013.
-
-
Is empty/Is not empty
-
The "Is Empty" operator is slightly different from the rest. This operator targets records that do or do not have a value for the chosen field.
-
For example, if I wanted to target individuals who I do not have an email address for, I would select "Is empty" for my operator.
-
-
In reverse, if i wanted to target records that I do have an email address for, then I would choose "Is not empty".
-