The DataMart
- Target Dashboard
- How to Manage your DataMart Fields
- How to View if a Contact is a Hard Bounce
- How to Unsubscribe One Contact from a Subscription(s)
Target Dashboard
The Target Dashboard is divided into 3 sections:

- Subscriptions
- Segments
- Uploaded Files
1. Subscriptions
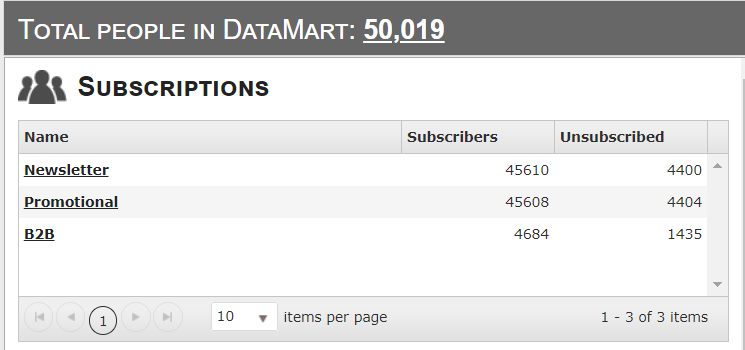
- Total People in DataMart This count provides the total number of unique contacts in your DataMart regardless of subscription or other statuses.
- If you click on the total number, you will be taken to
 to view all of your DataMart contacts in a convenient grid.
 - The total of records in your database are displayed on the screen to inform you on the potential recipients ( the total number will not be equals to the total of subscribers)
- The total of subscribed and unsubscribed for each subscriptions are displayed.
2. Segments
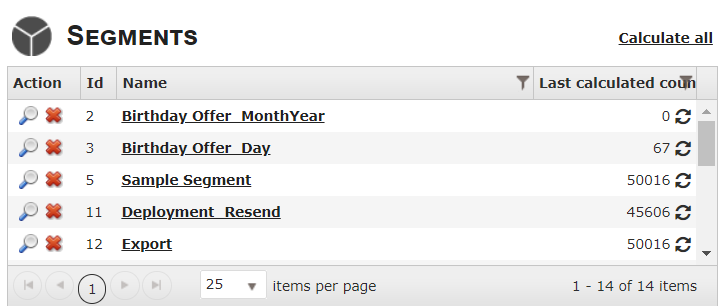
- This section lists all of the segments you have created in Connect.
- If you click on a segment, you are taken into the Segment Builder interface where you can edit that segment as well as other options.
- If you click on
 under Action, a window will pop up showing a preview of the segment, with shown and not shown DataMart fields
 - If you click on
 under Action, you can delete the segment


3. Segment Calculation
- The number of recipients for each segment will appear after calculation, under Last Calculated Count. Click on
 to refresh.

4. How to Filter Segment
- You are able to filter segment by Name or Size by clicking on the funnel icon located next to the respective fields.
- Name Filter
- Count Filer
5. Uploaded Files
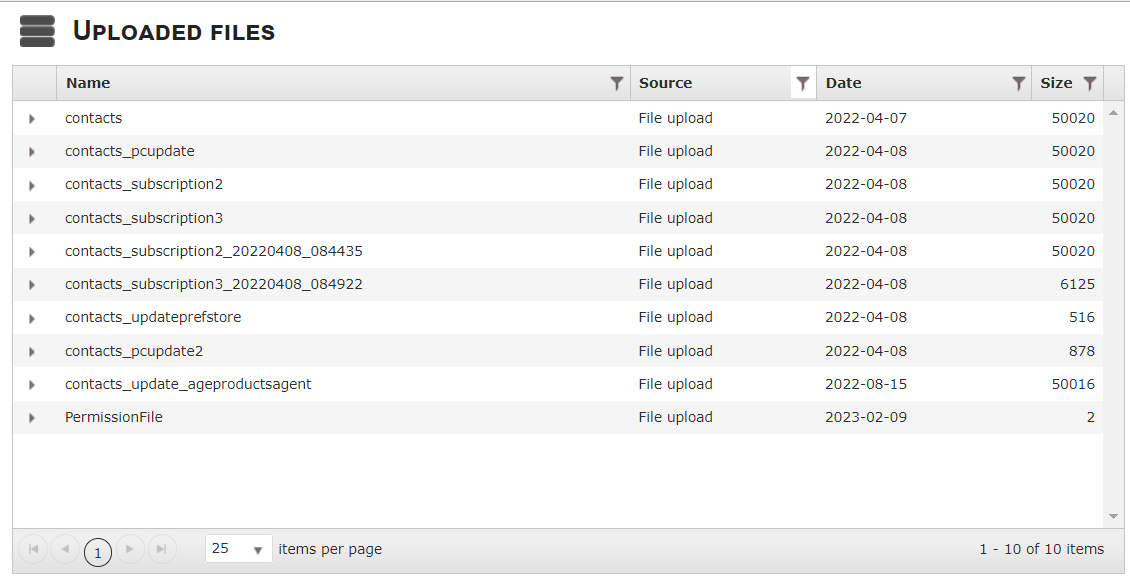
- This section will display all of the individual files that have been imported into Connect through 3 different sources:-
- Manual List upload
- FTP Import
- Restful API list upload.
- By default, the grid will only show Manual list uploads but you can change that by clicking the filter symbol on the Source column header and selecting which sources you want to be able to view.
- If you click on one of the file names, it will give you a snapshot of what occurred when the file was uploaded.
- One important thing to note here, if there were any rejected records in the file, the number will be clickable and you will be able to download the rejected records for review.
- Filters: We are able to filter
 by source or size.

- Name The filename
- Source Contains the different types of list uploads:
- Manual List upload
- FTP Import
- API list upload
- Size Represents the number of records that were in the list.
6. List Details
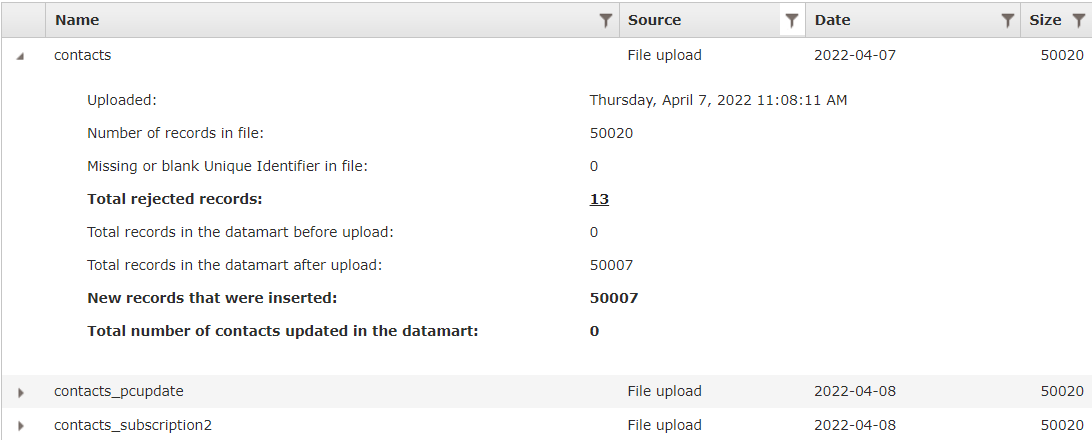
- By clicking the arrow , the list details will expand and will reveal important info regarding the list that was uploaded as shown above.
- When records are rejected, the number of rejected records will be clickable and will download automatically the list of rejected records with the error that occurred.
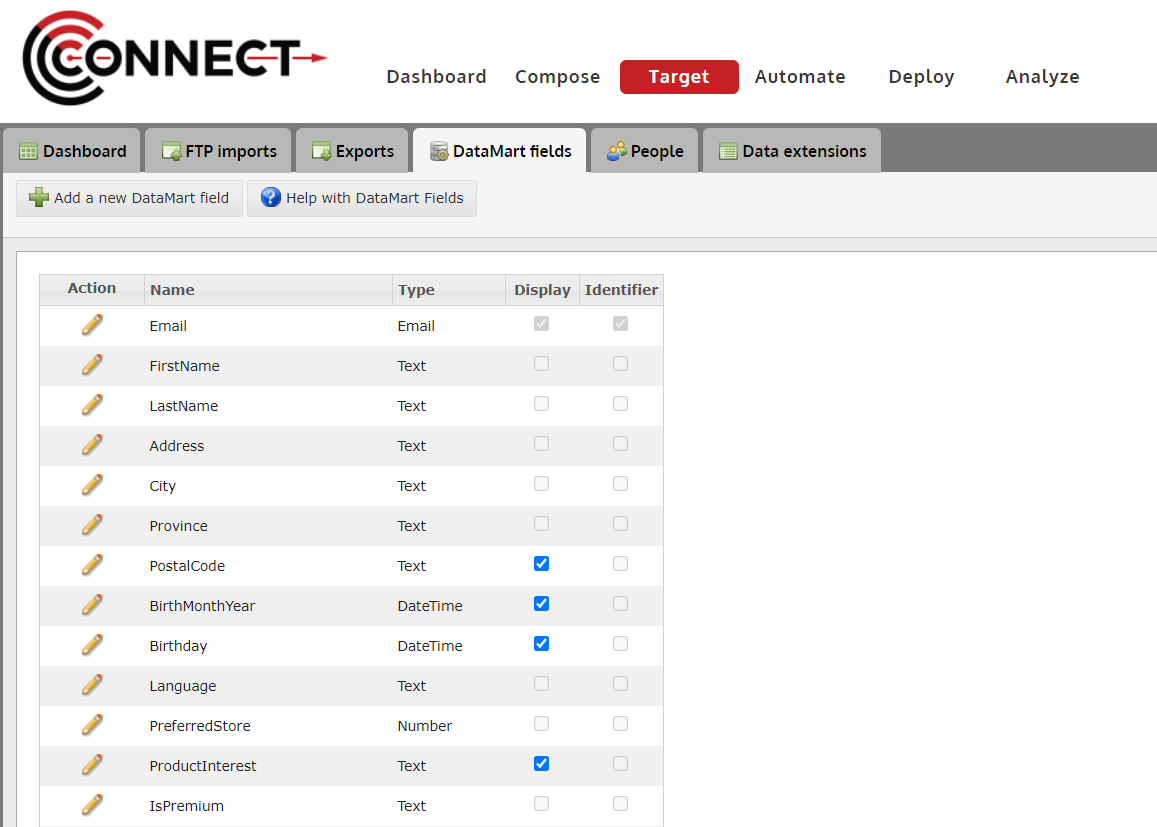
How to Manage your DataMart Fields
The fields of your DataMart help organize your entire DataMart. This is one of the first things you will want to setup before using CONNECT. Follow these steps to manage your fields.
1. Click on the "Manage Fields" button
Alert: The fields created/edited in this screen, organize your entire DataMart.
Please read these tips carefully before using this screen.
Tips:
- When selecting the "Identifier, you will want to choose either the email address field or a unique number that you are creating outside the system (ie. Member number or Account number).
- Currently, CONNECT supports only 1 email field in your database. If you have any other email address fields, they will need to be entered as text fields and cannot be used for deployment.
- Once a field is created and data is uploaded to the field, it cannot be removed from your DataMart.
- If you have created a field you no longer need and have not uploaded data to it, please contact CONNECT Support to have it removed.
2. Adding a New Field
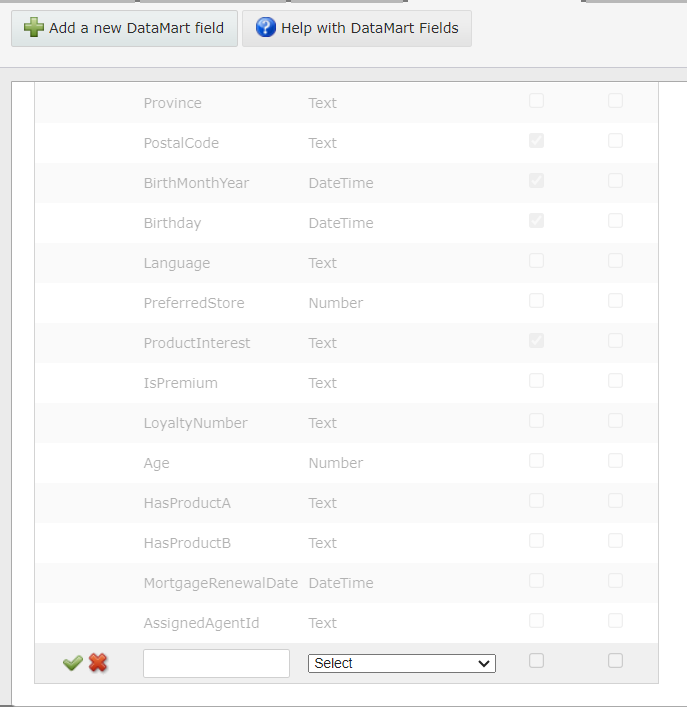
Steps:
- Click on the "Add a new DataMart Field" button
- Type in the field name you wish to add
- Select the data type that will be collected in this field.
- Click the checkmark to finish
OPTIONAL: Check off "Display" if you would like this field to appear in "Manage People".
3. Editing an Existing Field

- Click on the
 icon located next to the Field Name you would like to edit. Currently, you can only edit the name of a field.

How to View if a Contact is a Hard Bounce
If a specific contact is complaining that they are not receiving their email, they might have been flagged as a hard bounce.
To view if a contact has been flagged as a hard bounce by UMPIRE, follow these instructions:
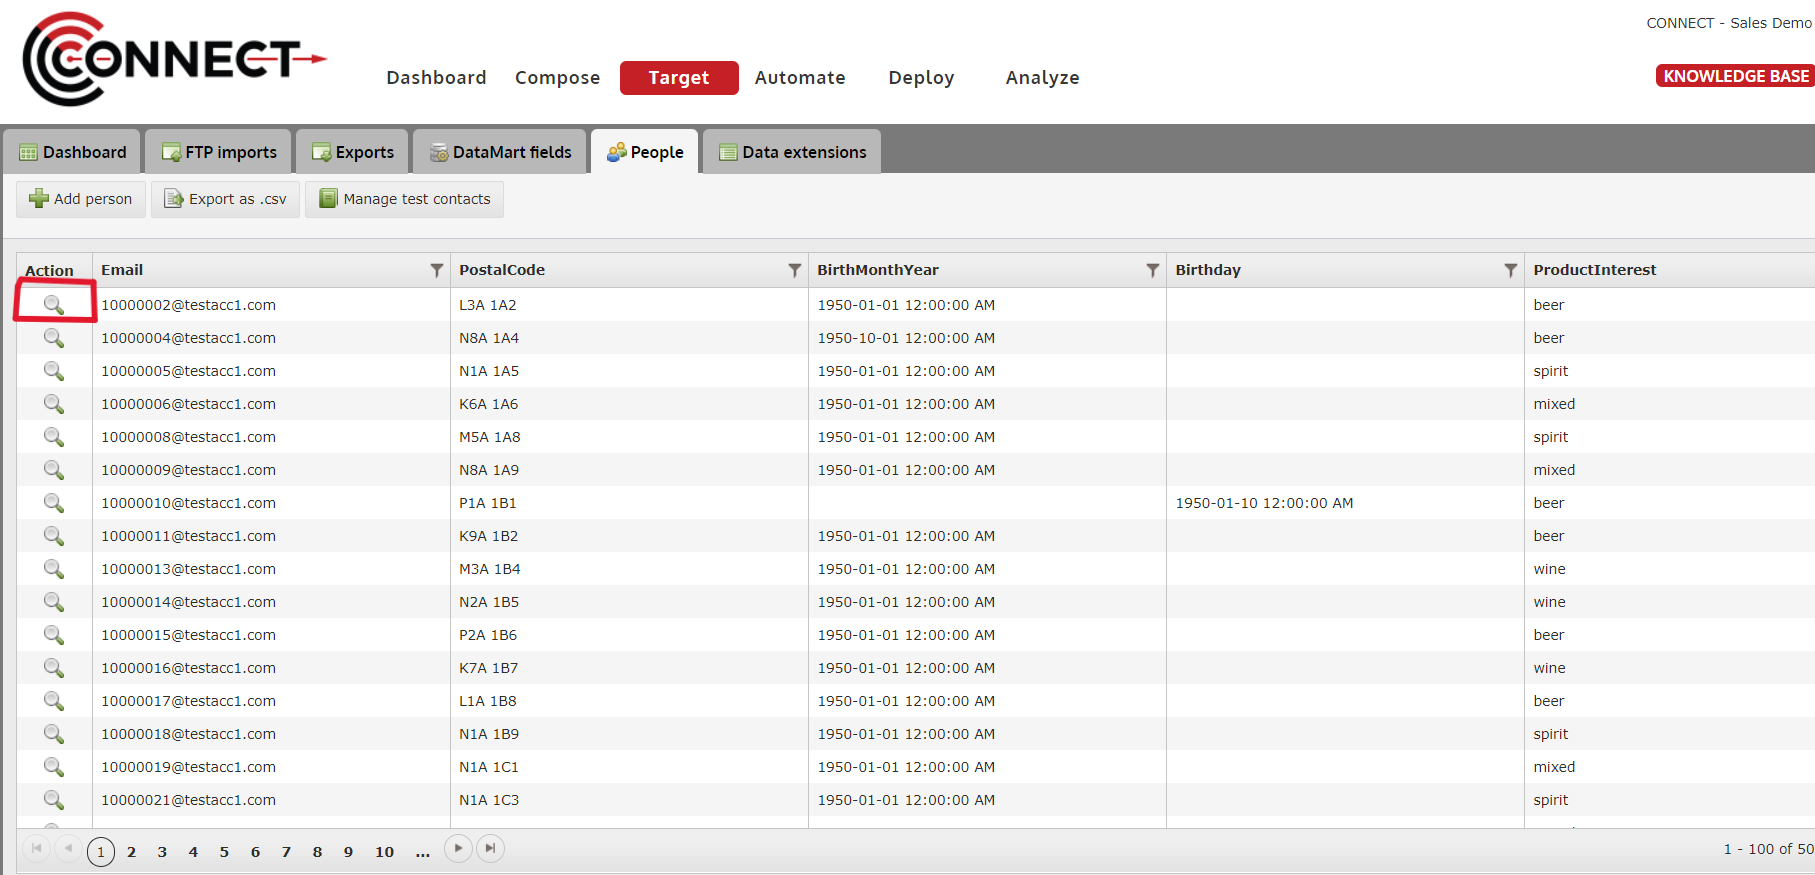
1. Navigate to the People tab in the Target screen
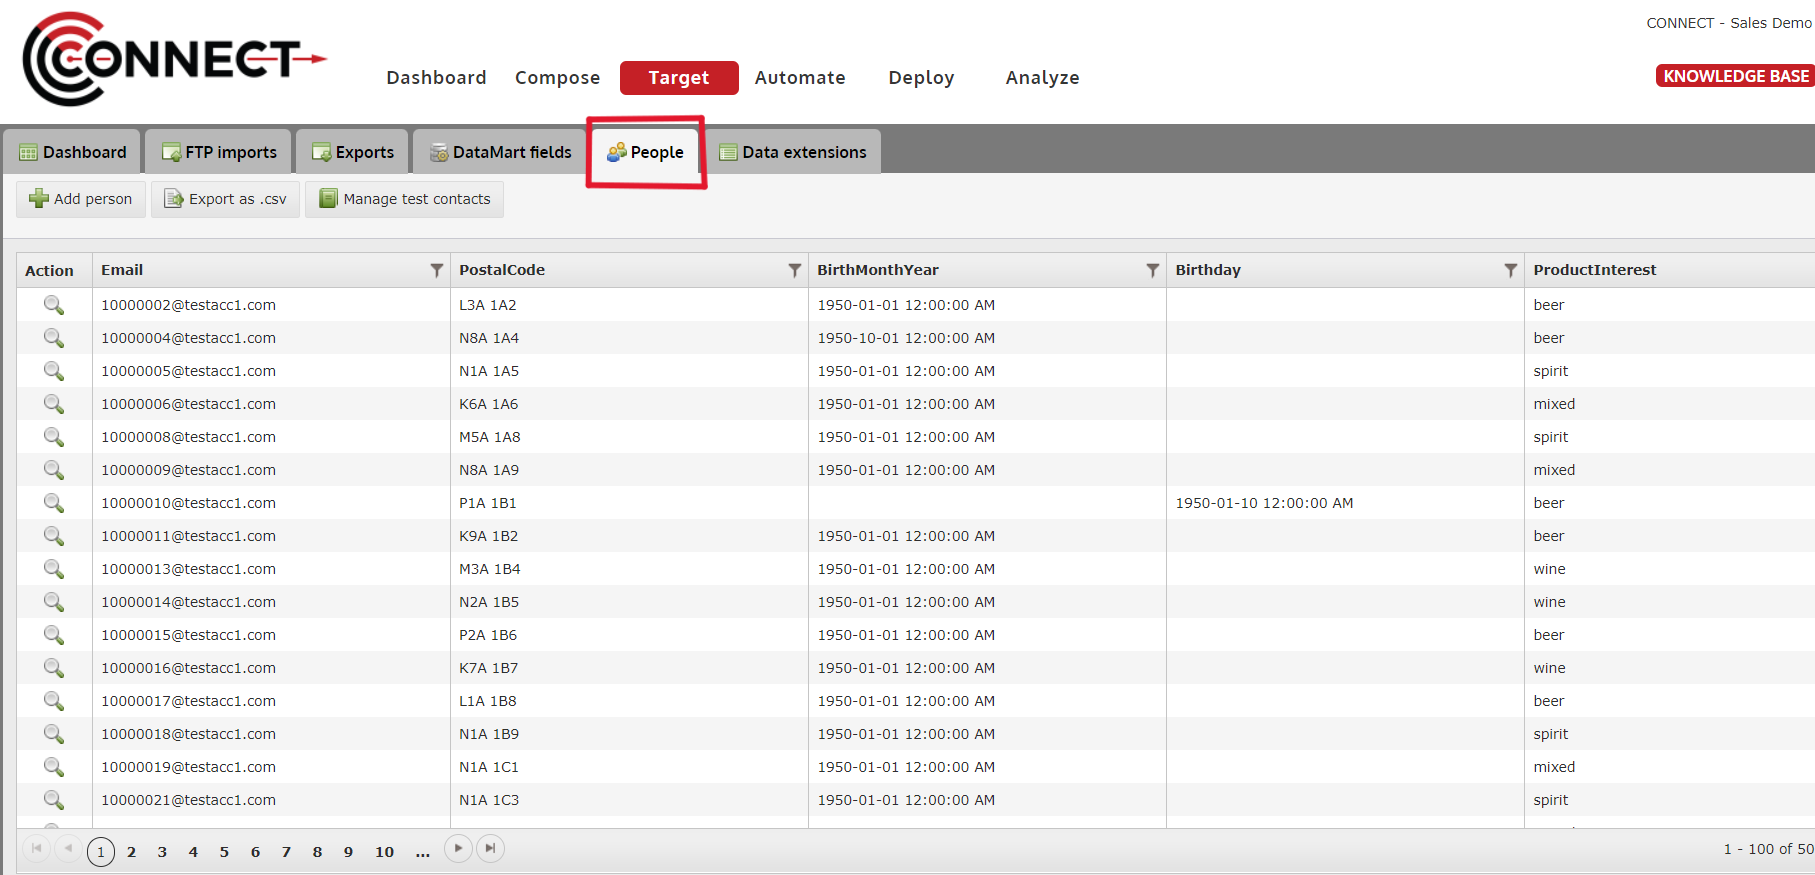
2. Using the filter options for the fields, Enter in Criteria so that you can locate the contact you wish to view
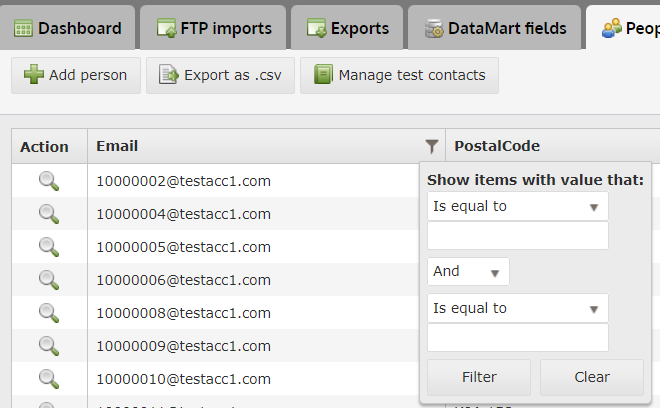
- Tip: The most common way to locate a contact is email address. Just click the filter option on your email field and type/paste in the email address of the contact you are trying to view.
3. Click on the "View" icon next to the Contact

4. On the Right Panel, you can view if a contact is a Hard Bounce

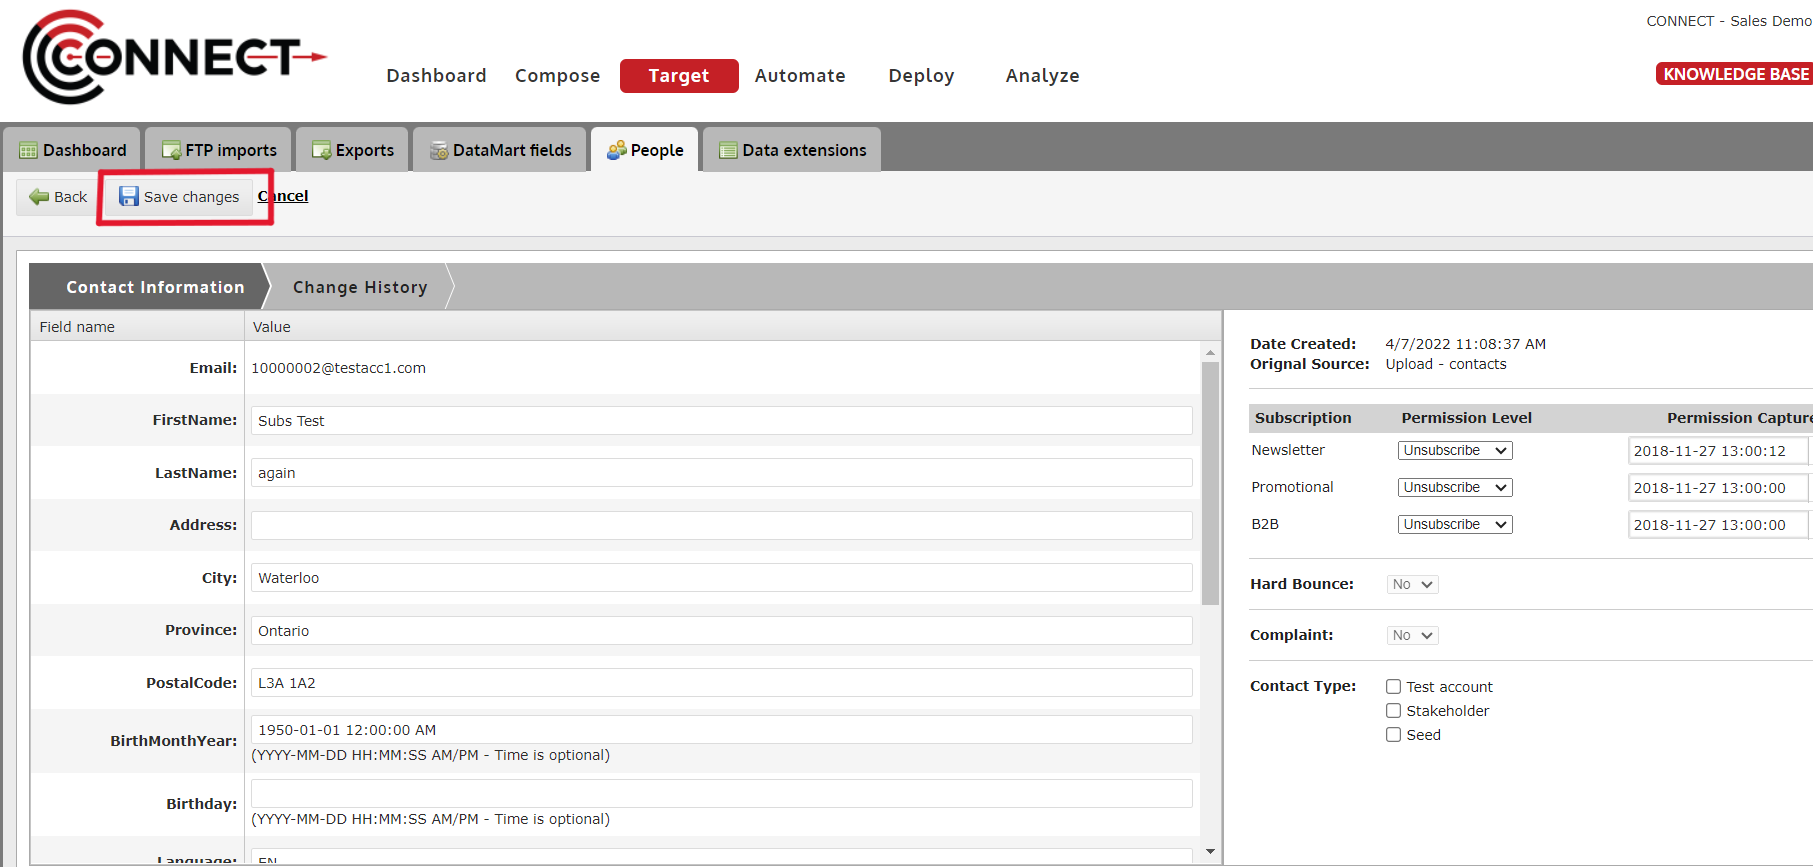
How to Unsubscribe One Contact from a Subscription(s)
If you come across an individual who wishes to be removed from one or multiple subscriptions you are currently deploying to, you can use this method to unsubscribe them from those subscriptions.
1. Navigate to the People tab in the Target page
2. Locate the contact you would like to unsubscribe and click the "View" icon
- Tip: Use the "filter" option on your "Email" column to quickly find a contact by their email address.
3. Click the "Edit record" button at the top

4. Change the permission level of the subscription(s) you want to unsubscribe them from, to "Unsubscribe"
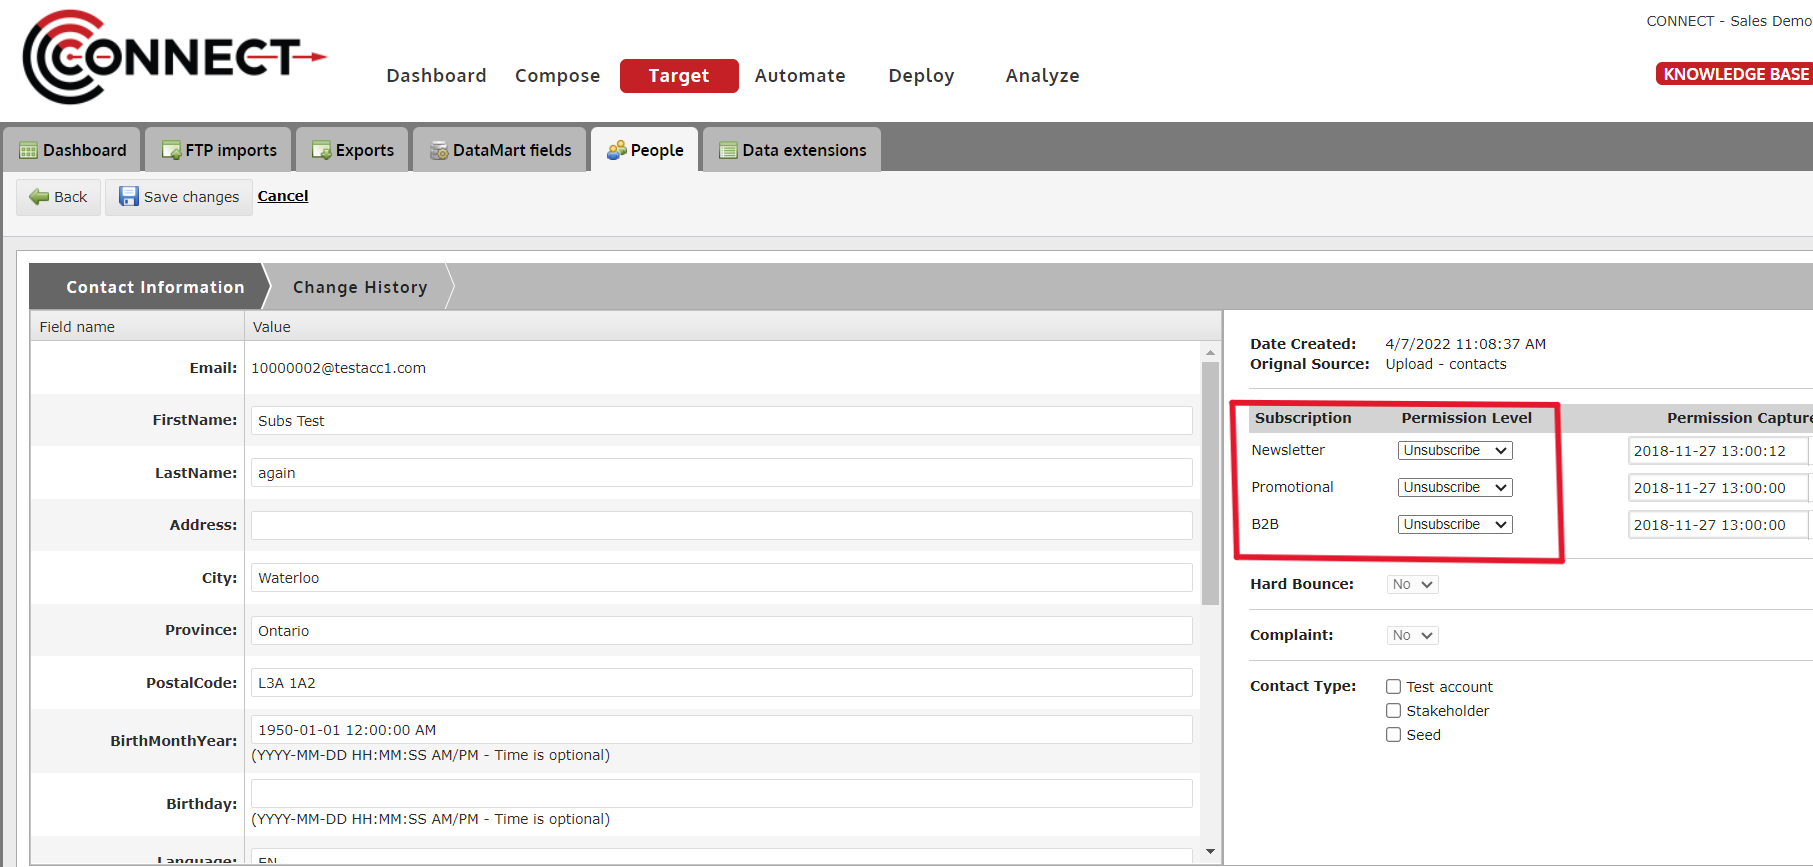
5. Click "Save changes" once finished