
Target Dashboard
The Target Dashboard is divided into 3 sections:

- Subscriptions
- Segments
- Uploaded Files
1. Subscriptions
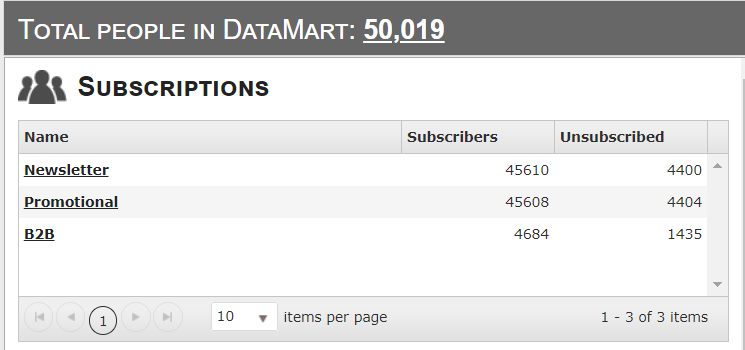
- Total People in DataMart This count provides the total number of unique contacts in your DataMart regardless of subscription or other statuses.
- If you click on the total number, you will be taken to

 to view all of your DataMart contacts in a convenient grid.
 - The total of records in your database are displayed on the screen to inform you on the potential recipients ( the total number will not be equals to the total of subscribers)
- The total of subscribed and unsubscribed for each subscriptions are displayed.
2. Subscriptions Filter
Name FilterSubscriber FilterUnsubscribed Filter
Each subscription is displayed with its respective number of subscribed and unsubscribed recipients.Note:One person can be subscribed and unsubscribed to the different subscriptions.If you click on the subscription name, you will be able to edit the subscription name if required.You are able to filter segment by Name or Size by clicking on the funnel icon located next to the respective fields.You are able to filter subscriptions by Name, Subscriber and Unsubscribed by clicking on the funnel icon located next to the respective fields.
3. Segments
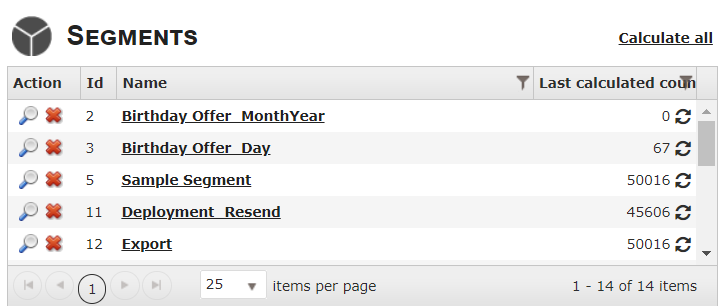
- This section lists all of the segments you have created in Connect.
- If you click on a segment, you are taken into the Segment Builder interface where you can edit that segment as well as other options.
- If you click on
 next
nextto under Action, a window will pop up showing a preview of the
 Segmentssegment,header,withitshownwillandcalculatenottheshowntotalDataMartcontactsfields - If you click on
 under Action, you can delete the segment
is targeting at that moment and display it in the grid. By clicking the number of record in each segment will appear.


4.3. Segment Calculation
- The number of recipients for each segment will appear after
calculationcalculation, under Last Calculated Count. Click on to refresh.

5.4. How to Filter Segment
- You are able to filter segment by Name or Size by clicking on the funnel icon located next to the respective fields.
- Name Filter
SizeCountFilterFiler
6.5. Uploaded Files
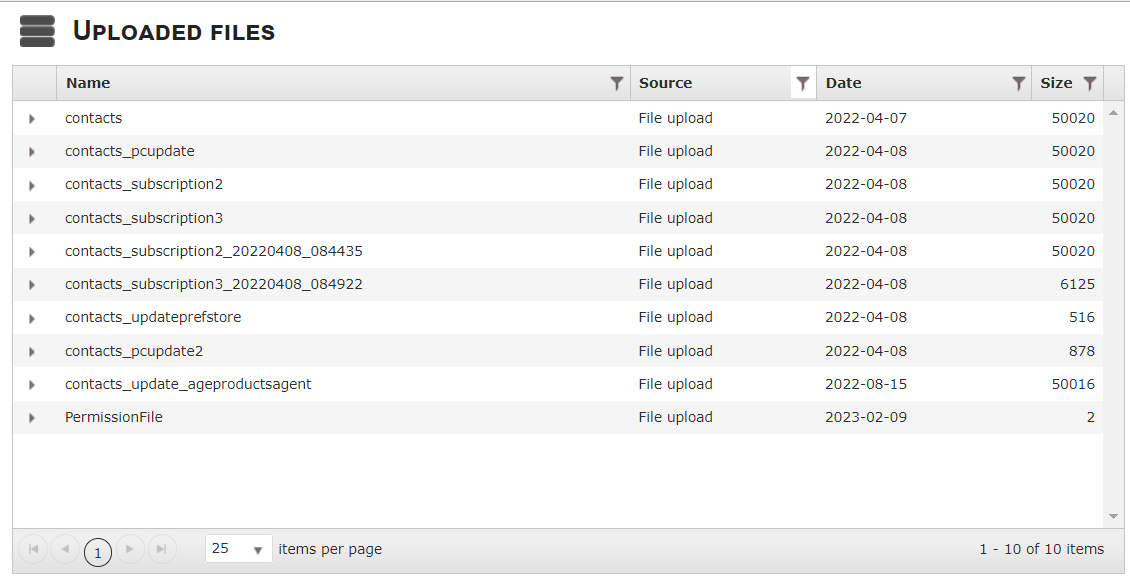
- This section will display all of the individual files that have been imported into Connect through 3 different sources:-
- Manual List upload
- FTP Import
- Restful API list upload.
- By default, the grid will only show Manual list uploads but you can change that by clicking the filter symbol on the Source column header and selecting which sources you want to be able to view.
- If you click on one of the file names, it will give you a snapshot of what occurred when the file was uploaded.
- One important thing to note here, if there were any rejected records in the file, the number will be clickable and you will be able to download the rejected records for review.
- Filters: We are able to filter

 by source or size.

- Name The filename
- Source Contains the different types of list uploads:
- Manual List upload
- FTP Import
- API list upload
- Size Represents the number of records that were in the list.
7.6. List Details
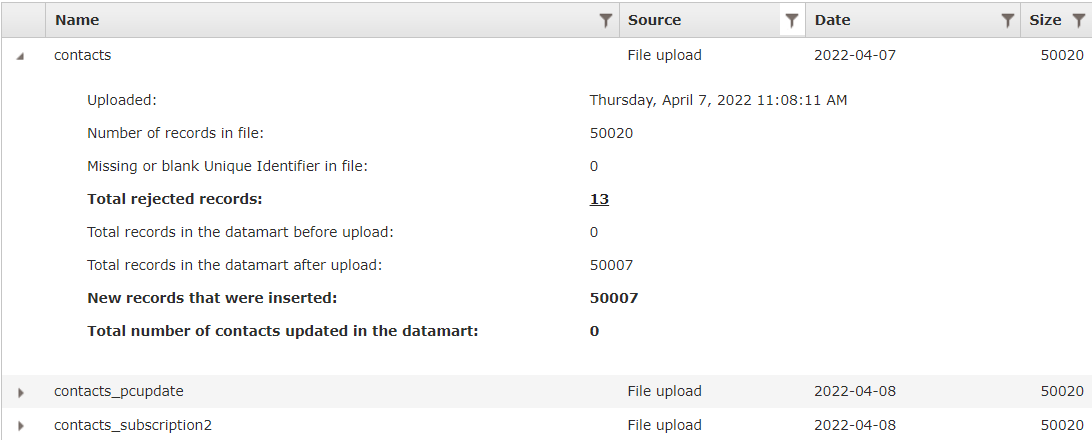
- By clicking the arrow , the list details will expand and will reveal important info regarding the list that was uploaded as shown above.
- When records are rejected, the number of rejected records will be clickable and will download automatically the list of rejected records with the error that occurred.